@puddly made it so that we avoid firing discovery events when flows immediately create a config entry in #155753 and added firmware flashing debug loggers to hardware integrations in #156480
@xE1H removed the arbitrary forecast limit for meteo_lt in #155877
@emontnemery fixed the progress step bugs in #155923, corrected migration to recorder schema 51 in #156267, as well as the checking of collation of statistics_meta DB table in #156327
@TimoPtr made sure to clean register callbacks when mobile_app reloads in #156028
The breaking changes remain the same as in 2025.11.0:Set the assumed state to group if at least one child has an assumed state
Previously, the group’s assumed state was always false, regardless of the state of its child entities.
This has now changed:
The group will now have an assumed state of true if at least one child entity has an assumed state. This makes the group’s assumed state reflect the uncertainty of its children more accurately. These domains have been added: switch, fan, light, and cover.
The mealie Integration now requires Mealie version 2 or later.
Mealie version 1 is no longer supported. Version 2 was released in October 2024, so over a year ago. Given the differences between versions 1 and 2, we are no longer able to support or test backward compatibility with version 1.
The tilt position of motion_blinds devices have been corrected to align with the Home Assistant standards. The new tilt position will be: 0 = closed/covering the window opening, 100 = open/letting light through.
The previous tilt position can be converted to the new tilt position as follows:
new = 100 - old
current_tilt_position = 100 -> 0
current_tilt_position = 75 -> 25
current_tilt_position = 50 -> 50
current_tilt_position = 25 -> 75
current_tilt_position = 0 -> 100
open_cover_tilt -> close_cover_tilt
close_cover_tilt -> open_cover_tilt
Any automations concerning Motion Blinds devices that use the current_tilt_position attribute or use tilt open/close will need to be adjusted.
The mobile_app integration, which supports the iPhone and Android companion apps, now handles zone-only updates better. When your companion app sends just the zone name (not the exact coordinates), the device tracker will show the zone’s friendly name.
The person entity now shows the zone’s friendly name (not its object ID) for custom zones. This might break existing automations that trigger on a person’s state.
As an example, if you have a zone named zone.kids_school with the friendly name School:
Before this change, the state of the corresponding person and device_tracker entities would be kids_school when the “Location Sent” in the companion app was set to send “Zone Name Only” and School when it was set to “Exact”.
After this change, the state of the corresponding person and device_tracker entities will be School for both the “Location Sent” settings in the companion app.
The discovery of Renault functionality was previously based on assumptions that may have created invalid and non-functional entities. These will no longer be created.
The Traccar integration has been updated to use a more secure API Token for authentication. This is a required, one-time breaking change to align with Traccar’s security recommendations and ensure the integration continues to work.
This release migrates the integration away from the older username/password method, ensuring continued stability and security for all users while also allowing users with SSO-based setups to use the integration.
When you update Home Assistant, the existing Traccar integration will need to be re-authenticated:
Generate an API Token on your Traccar server (you’ll find this option in your Traccar server’s user settings).
Go to Settings > Devices & Services > Traccar Server.
Click “Reconfigure” and enter your new API Token when prompted.
Once you’ve done this, your Traccar devices and entities will work exactly as they did before.
The Account tier and Gold tenure sensors have been retired, as they no longer receive updates following the transition from Xbox Live Gold to Xbox Game Pass. Additionally, the In party and In multiplayer binary sensors have been removed, since they’ve been non-functional for quite some time.
Since Home Assistant now requires you to swap from Supervised to Docker or OS i figured i’d make a quick tutorial on creating a quick Docker tutorial on reinstalling it.
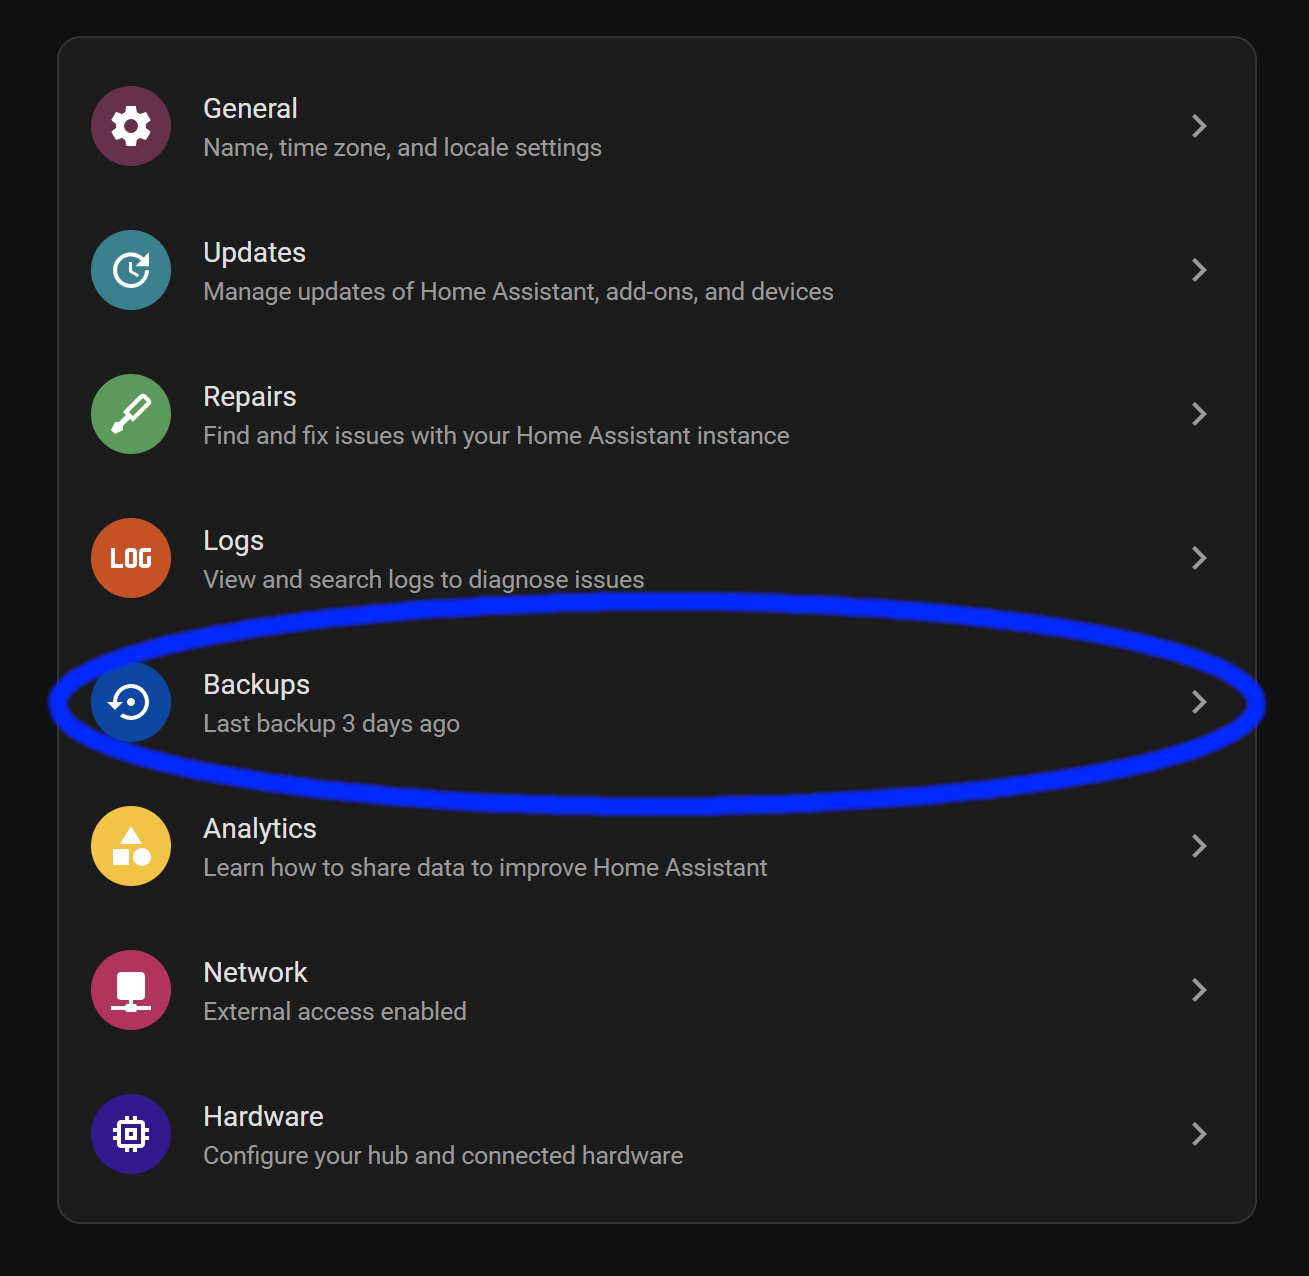
Backing Up/Downloading Encryption Key
First, we go to your Settings
Then Backups
Before you continue, make sure you have a new backup and download it to your computer so we can upload it later. If you’re using Home Assistant Cloud, you just have to make a new backup and upload it to the cloud if you want to restore from the cloud.
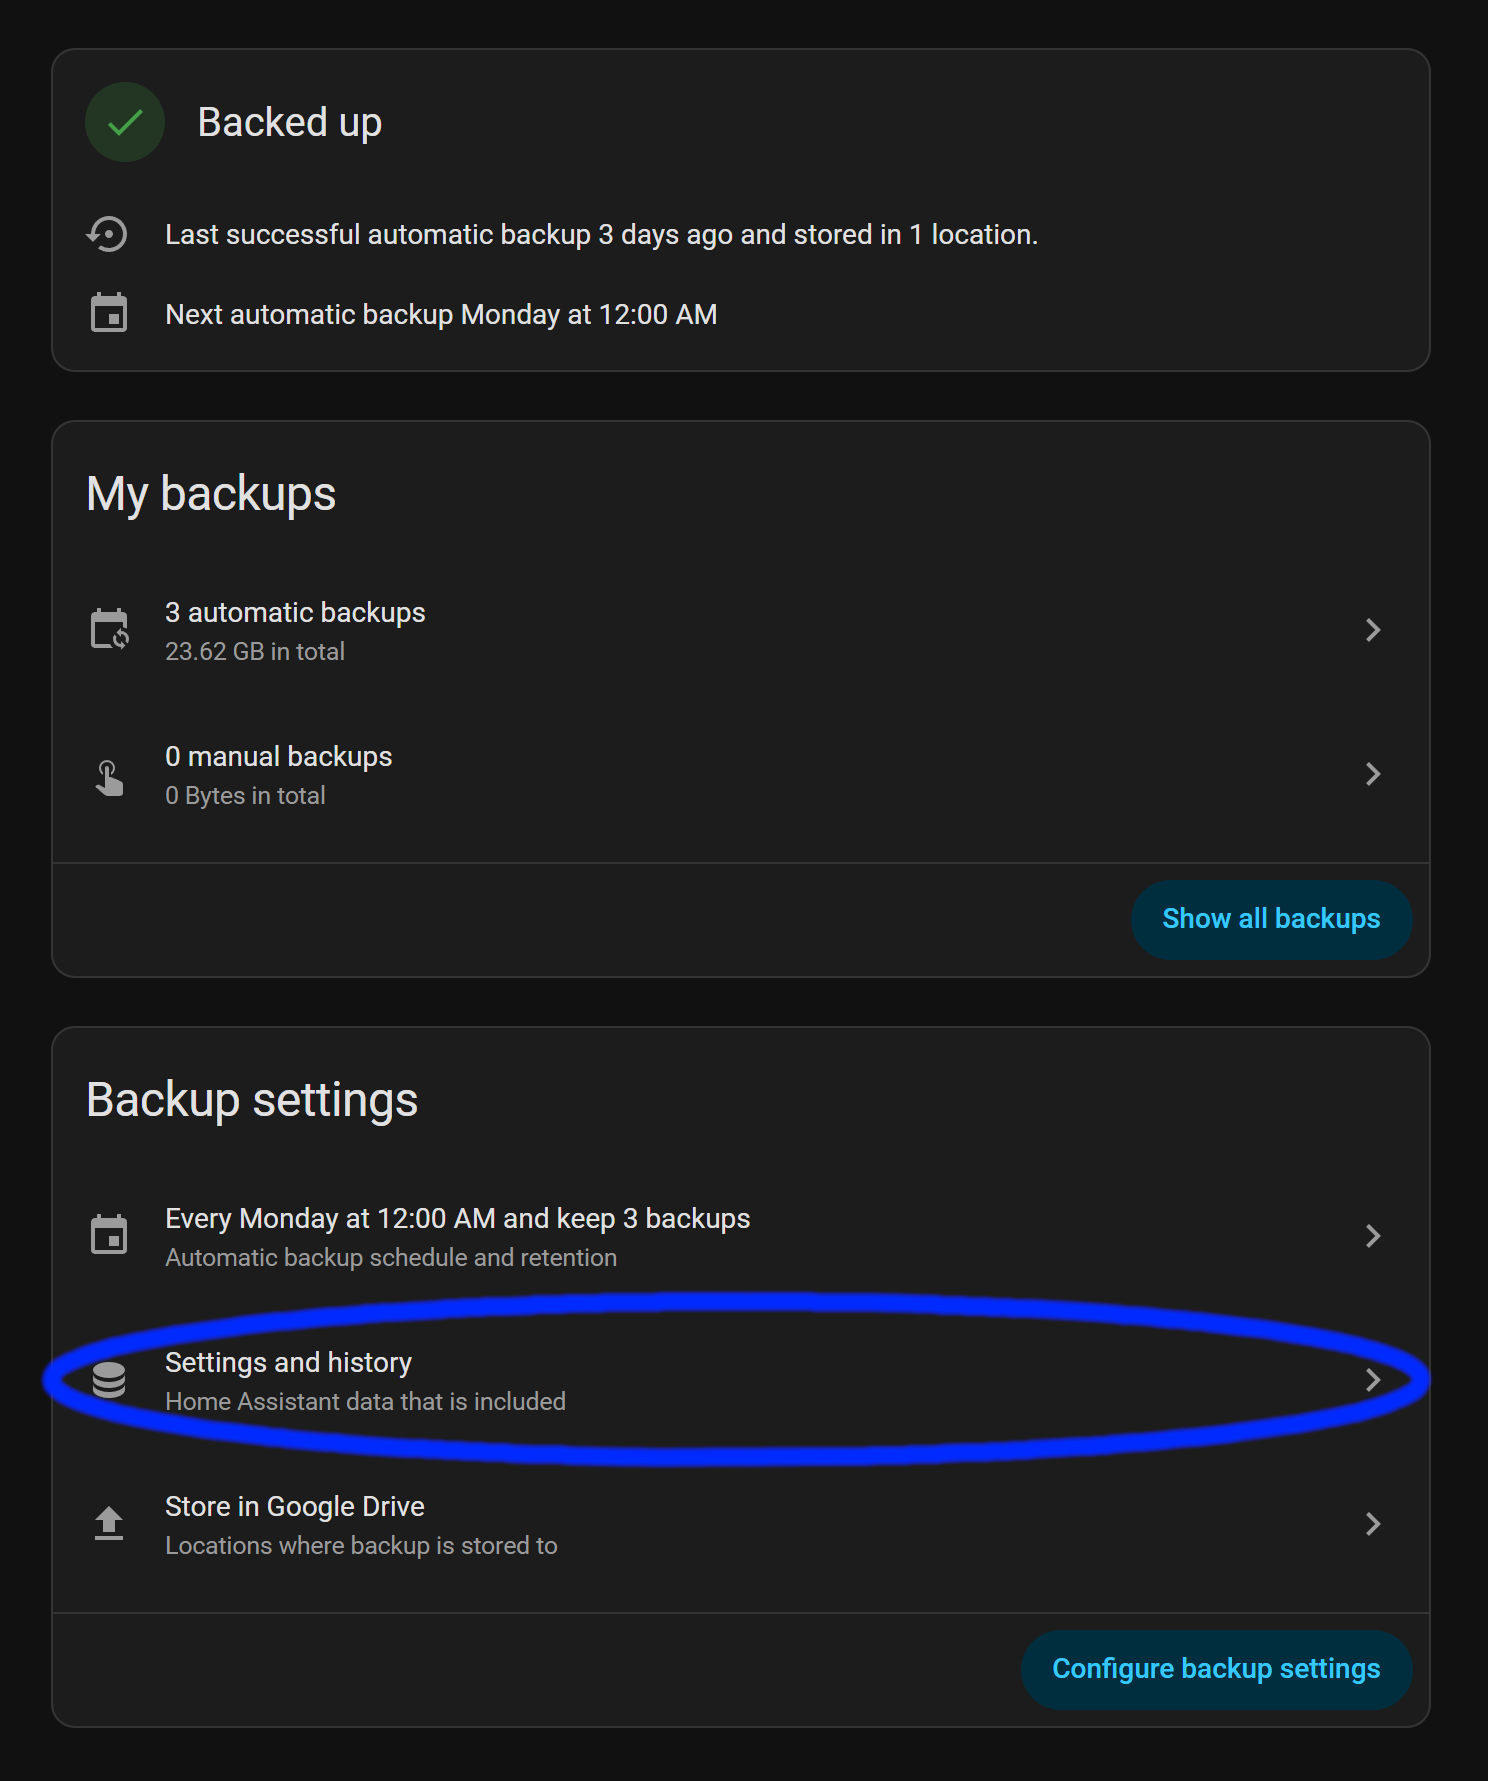
Click Settings and History
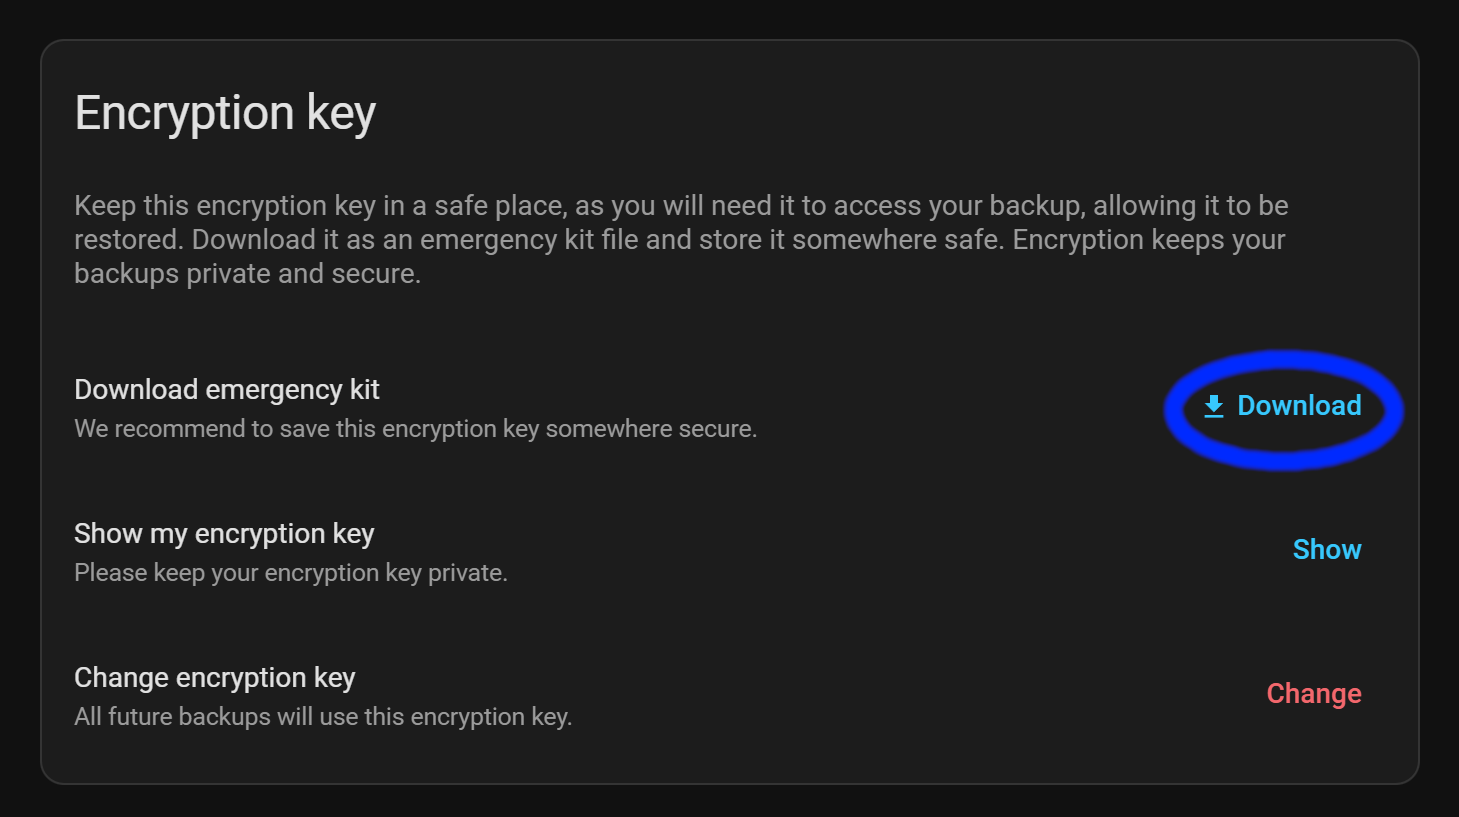
Download your Emergency Kit txt file
We have to make sure you have your emergency kit downloaded so we can use your encryption key when you restore from your backup.
After the Emergency Kit is downloaded, go back.
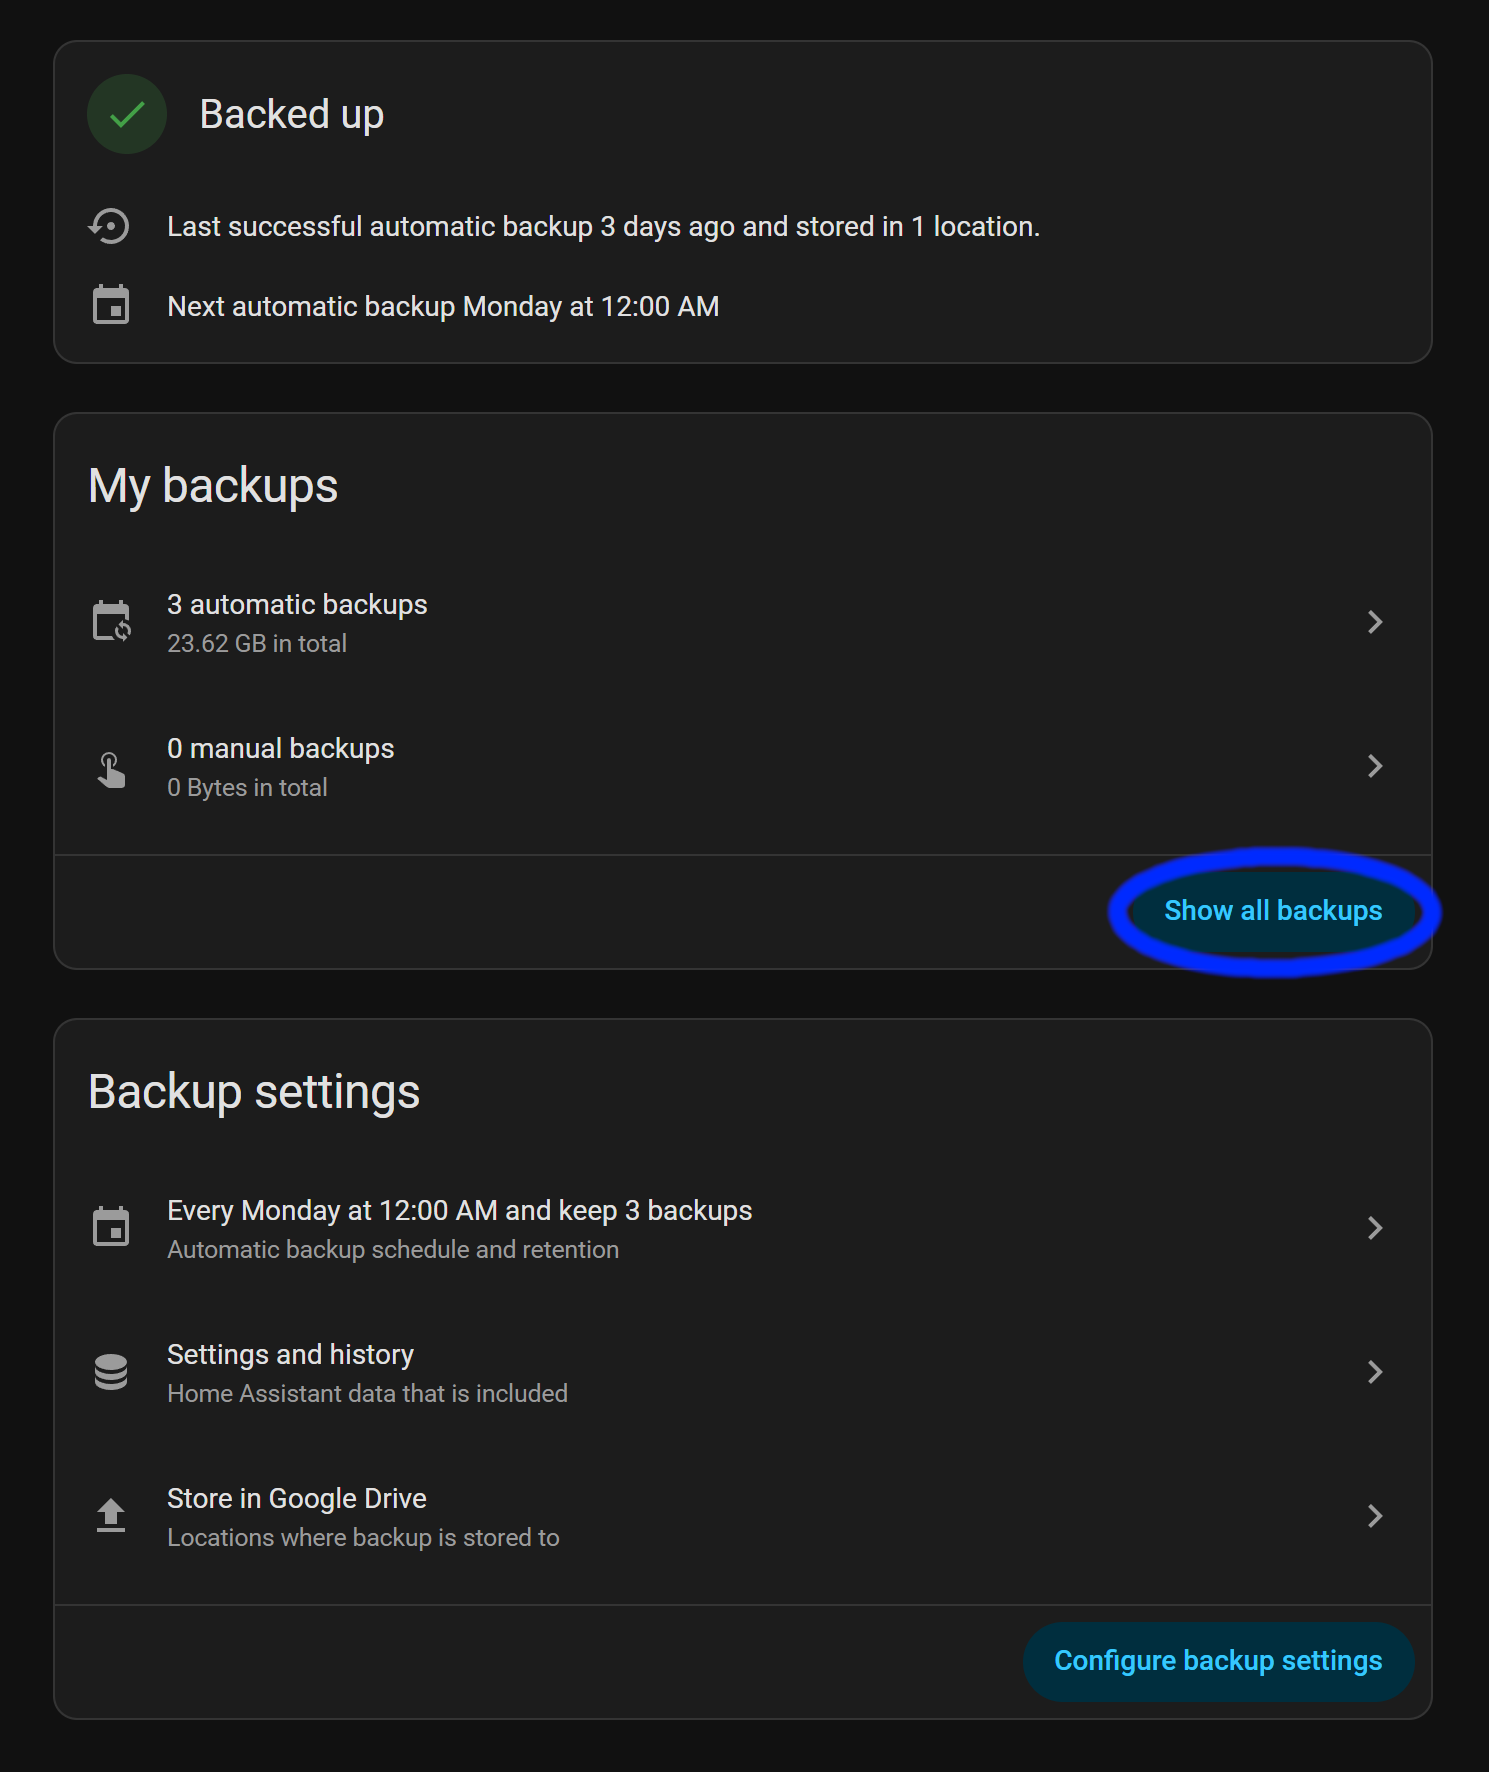
Click Show Backups
Now we go and download your latest backup.
Click the three vertical dots
Click on download.
This will take a while if your backup is large.
After that’s all done, we can continue on!
While that is downloading, we should either create your compose file or set up Portainer.
Here is the basic Compose file for getting Home Assistant running in Docker.
*Note* The official docs for installing Home Assistant in a Docker Container includes container_name: homeassistant above the line image: "ghcr.io/home-assistant/home-assistant:stable". Avoid container_name unless you have a specific need (legacy scripts, monitoring tools expecting a fixed name). Rely on the service name and Compose defaults for cleaner, more portable setups.
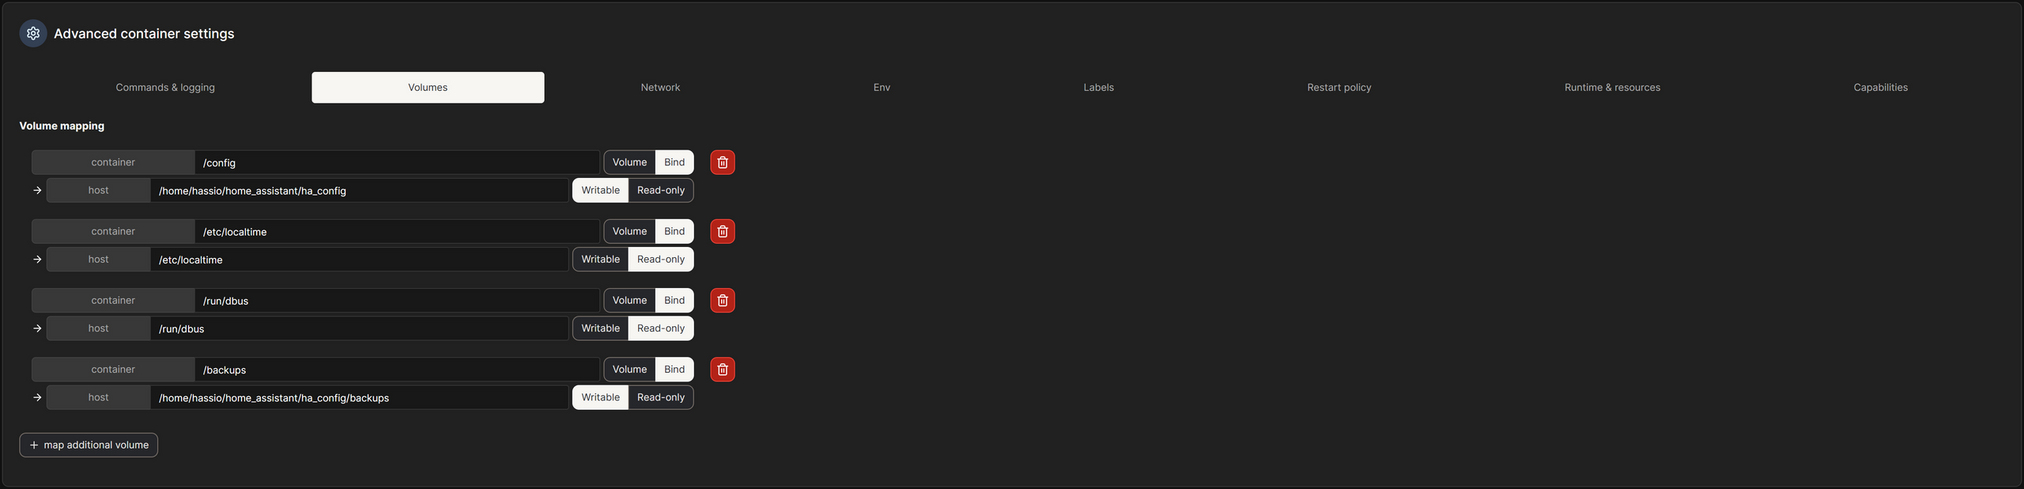
Here is where we have to change /PATH_TO_YOUR_CONFIG to where you want to store your Home Assistant configuration files.
    volumes:
      - /PATH_TO_YOUR_CONFIG:/config
YAML
We have to create a folder like /home/hassio/home_assistant/ha_config, in my case, hassio is the username of this account. I created a folder home_assistant and then ha_config.
I created two folders nearly named the same because I want to run some addons as well, so I put the config folder for each addon in home_assistant, then my Home Assistant configuration folder is ha_config.
All you need to do is SSH into your device with something like Putty or CMD/Terminal. Log in as the user you want to manage the Home Assistant Docker setup with. In my case, it’s hassio. Then, create the folder or folders, as I did for my setup, or create a folder in your user’s home directory and call it good. It’s up to you what you want to do.
Create a folder with:
mkdirha_config
Bash
Replacing ha_config with what you want to use, if you use a different name.
Understanding the Configuration
    volumes:
      - /etc/localtime:/etc/localtime:ro
YAML
This line allows Home Assistant to read the time on your computer. Assuming it’s been set up already.
    volumes:
      - /run/dbus:/run/dbus:ro
YAML
This allows Home Assistant to communicate with the host’s system bus — e.g., to talk to system services (BlueZ Bluetooth, systemd, Avahi, some hardware/service discovery daemons) that expose APIs over D-Bus. Home Assistant uses this to access some integrations that expect a system D-Bus to be available on the host.
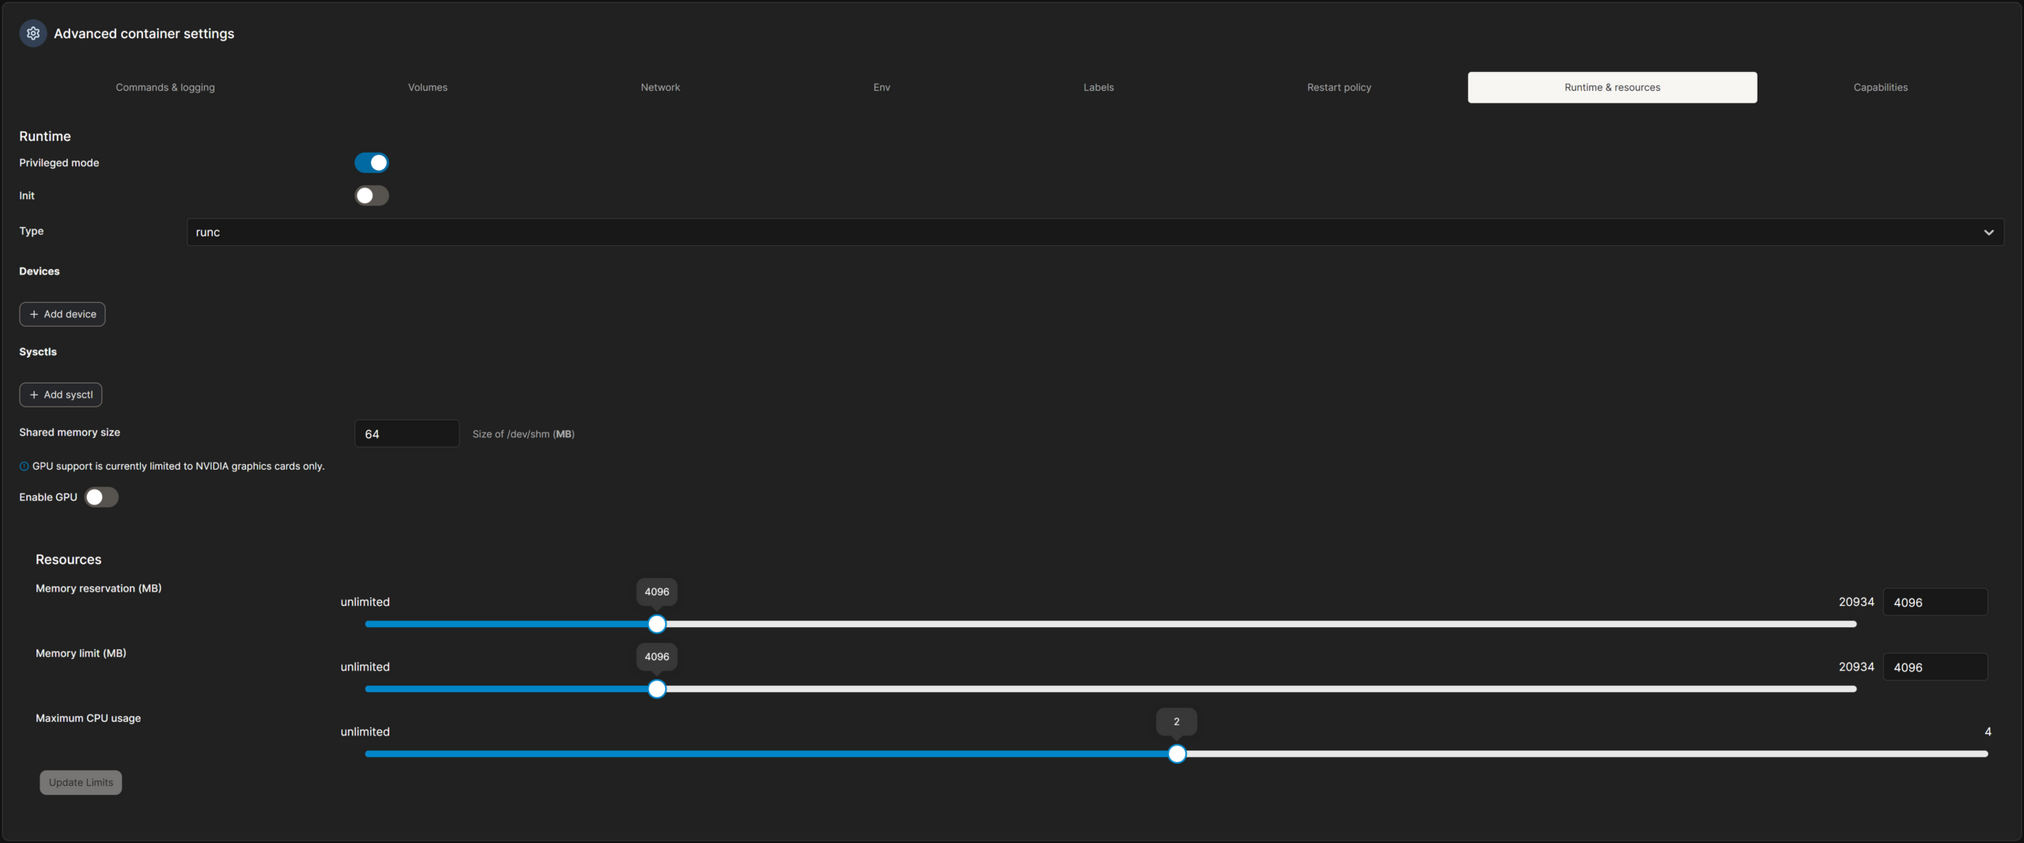
restart: unless-stopped tells Docker to restart the container automatically if it exits (crashes, is killed, or the daemon restarts).
privileged: true grants the container nearly every capability the host kernel gives processes — roughly equivalent to giving the container full root-like access to the host.
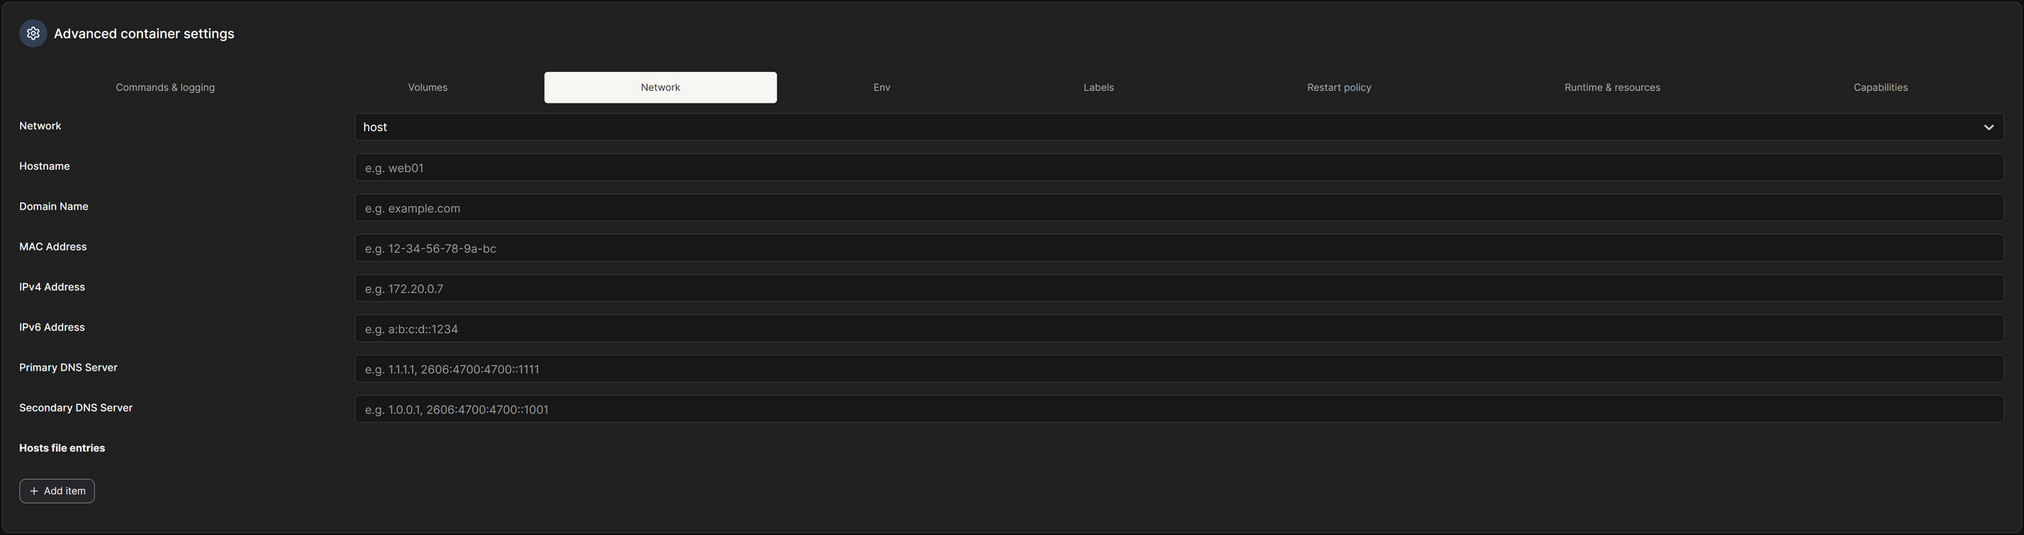
network_mode: host makes the container share the host’s network stack. Practically: the container has the host’s IP addresses and network interfaces. It does not get its own isolated network namespace. In this mode, you do not need ports: mappings — the container listens on the host interfaces directly, localhost inside the container == localhost on the host, service discovery via Docker networks (service-name DNS) does not apply for other containers — host networking bypasses those DNS aliases.
Make sure you save the file, then we can continue!
Setting up the Container in Portainer
First,we have to navigate to the Portainer host. If you need help with setting up, check out this post!
Next, we have to start creating a new container.
We are going to be using the following details to input into Portainer.
First, we navigate to the containers section and click on Create Container
Then select New Container on the top right
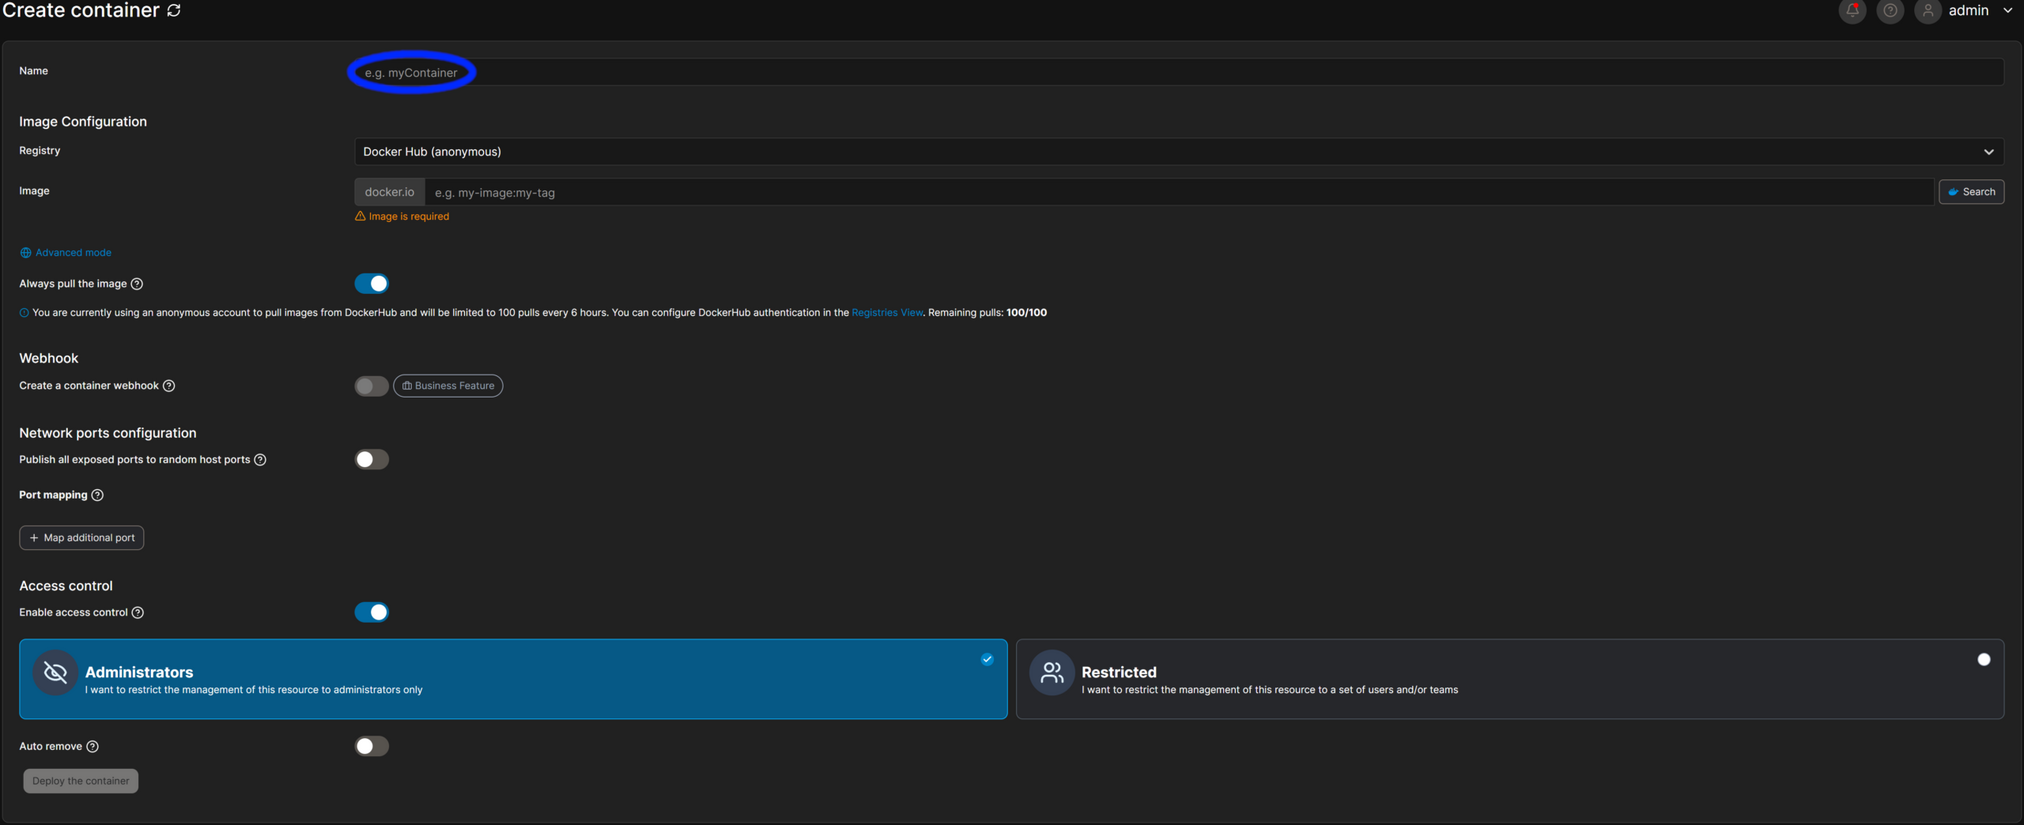
You should get a page like this, where we can put the name of the container from line #2 from above.
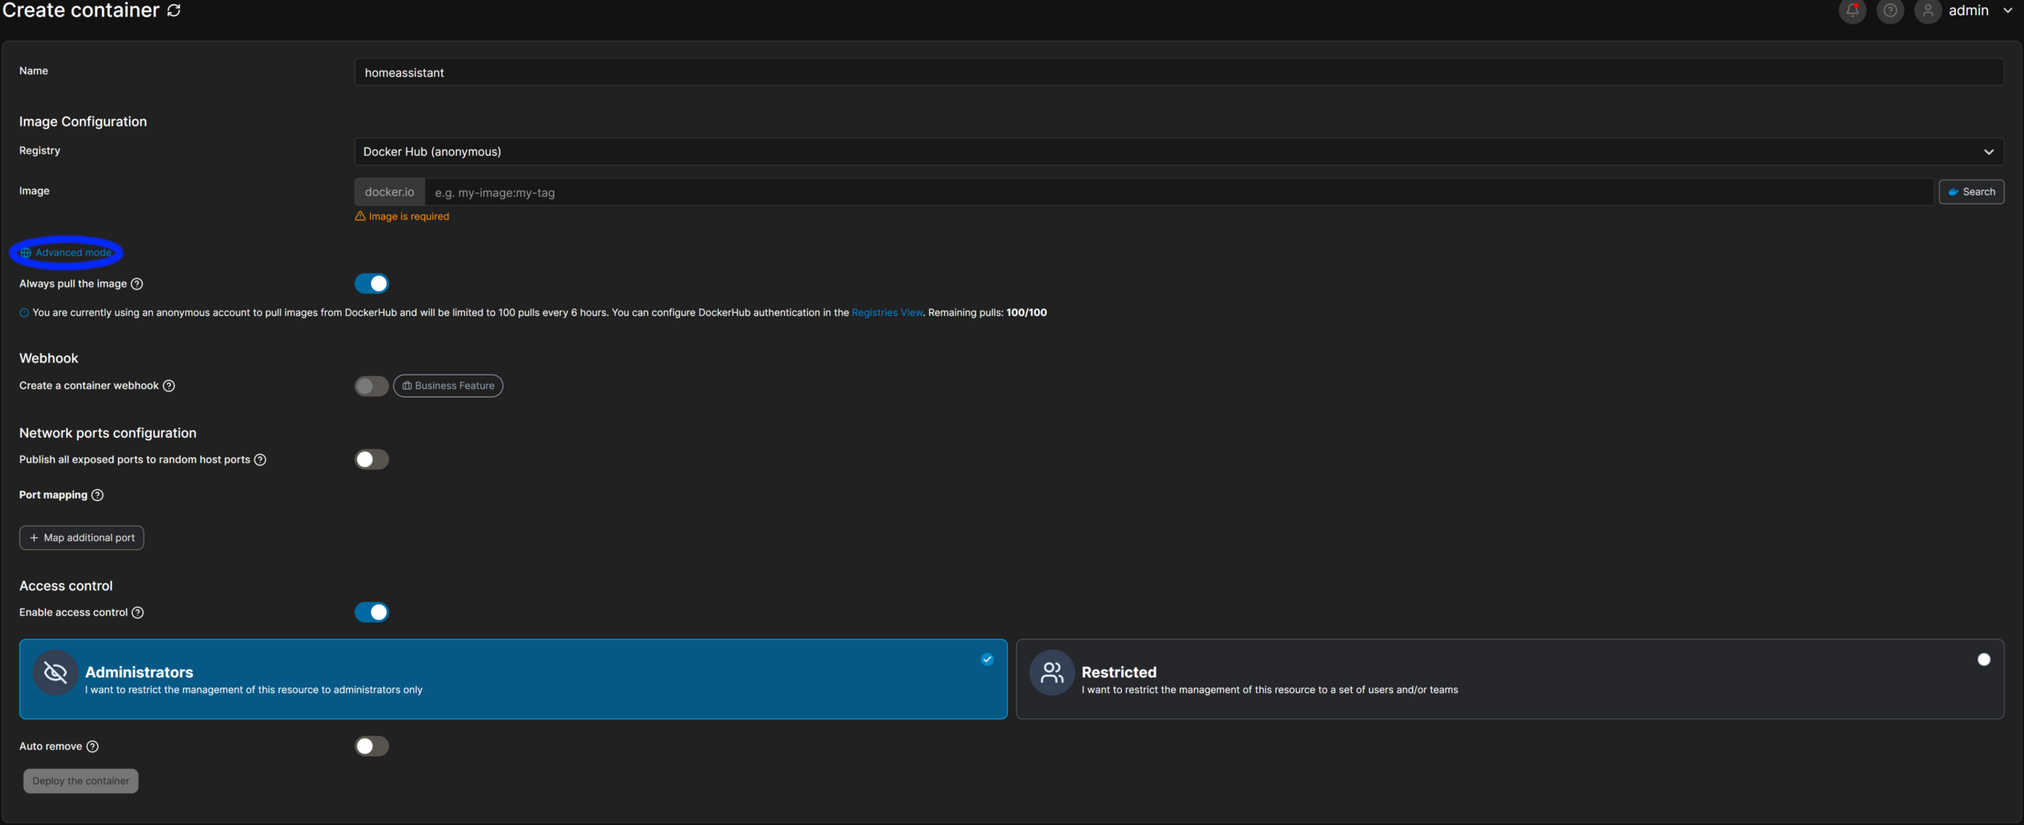
Now we click on Advanced
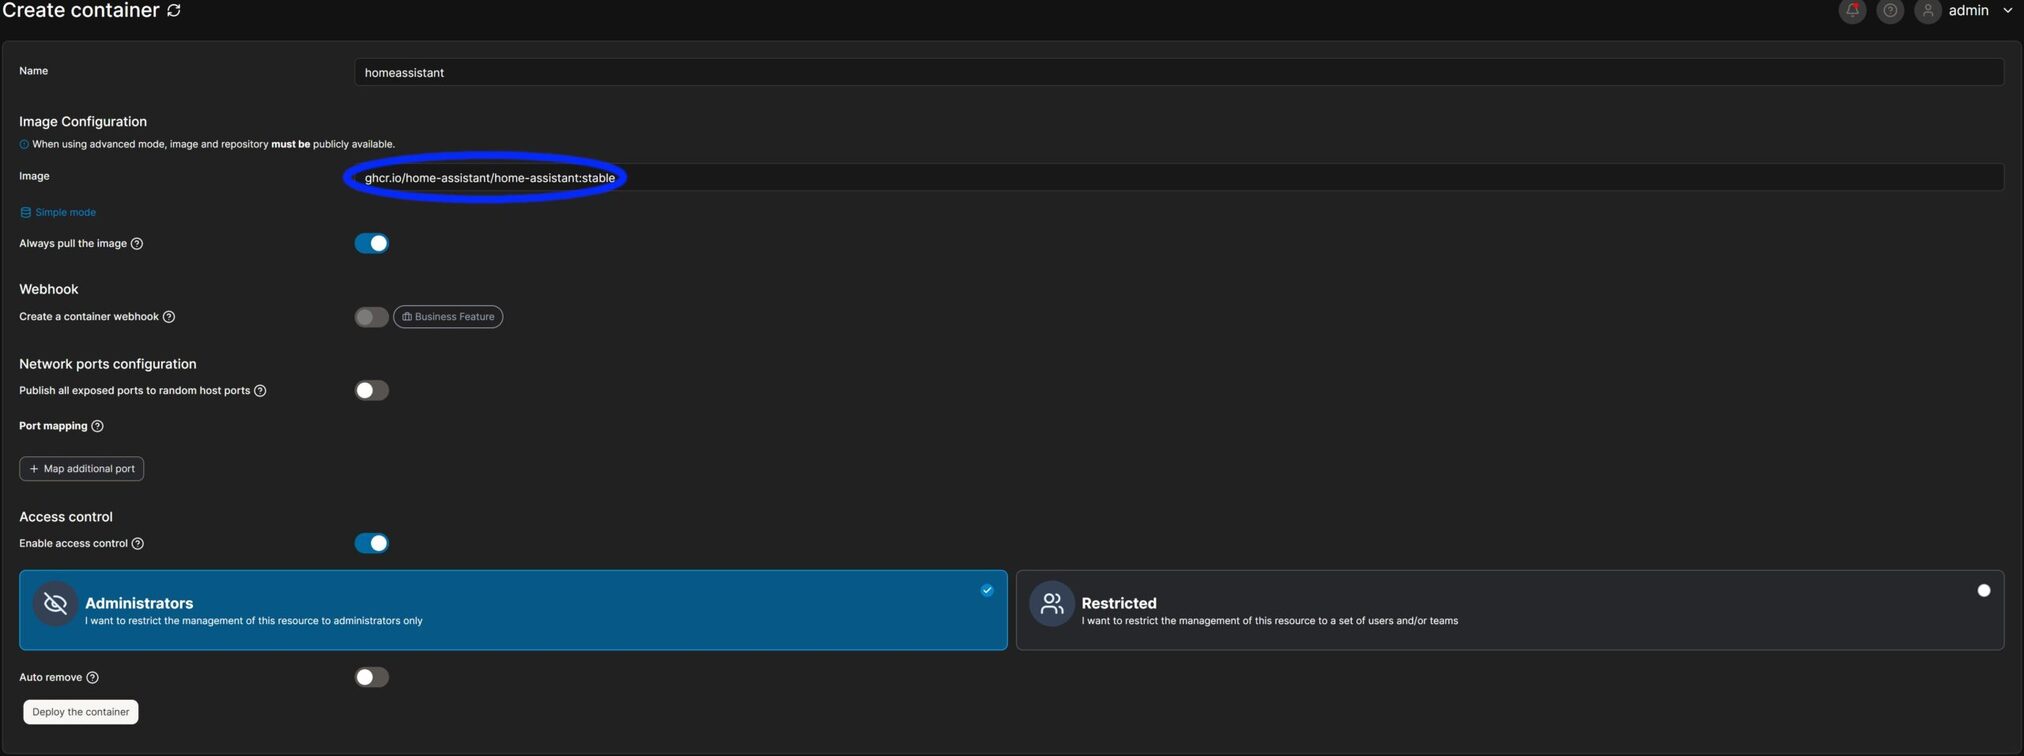
Paste the URL from the image section, copying between the quotes
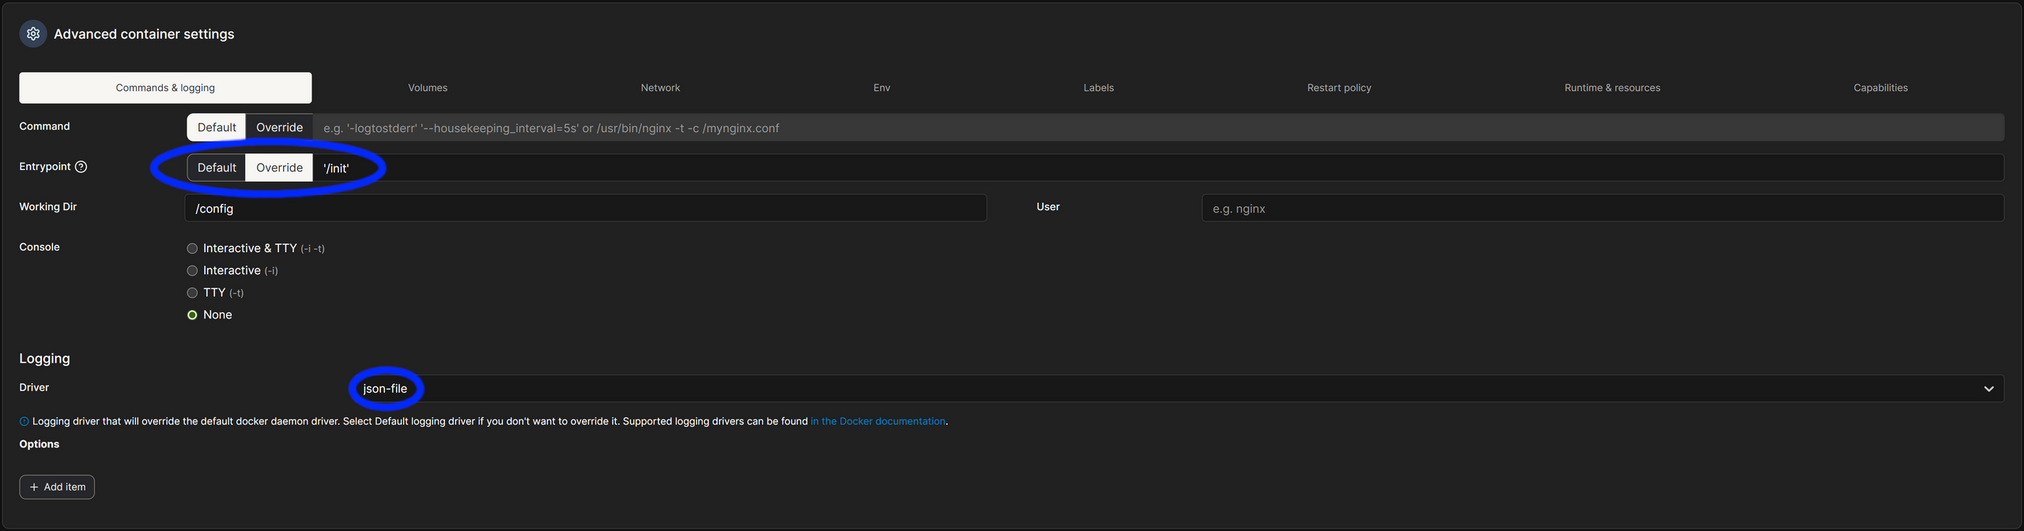
Set the Entrypoint to '/init' and the Logging Driver to json-file
Set your volumes, copying everything from the volumes section from above. Replace the host/config section and optionally set the /backups folder if you want to set a backup location on your host
Set your Network to Host
Set your timezone and, optionally, the PUID and GUID to the user’s home folder that you’re putting the files in, so you don’t run into any folder/file permission issues
Set your Restart Policy
Here we set the Privileged Mode, and any Devices that you need to mount. Optionally, but recommended, set the Resources to a max of what I have set here. I have 5.840 Entities, 4,297 Sensors, 160 Integrations, and 103 Automations. I have no issues running Home Assistant with these restrictions.
Now we can click Deploy to download the image and start the container!
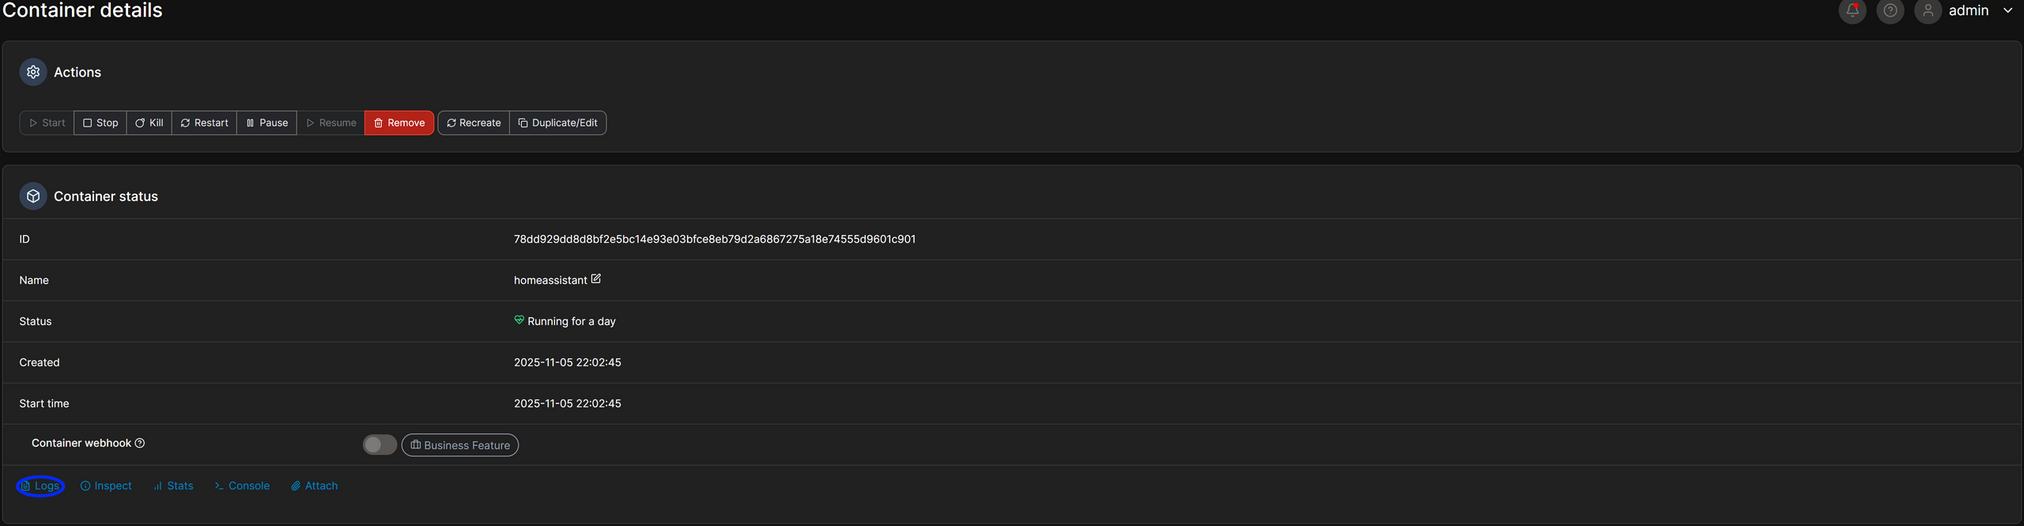
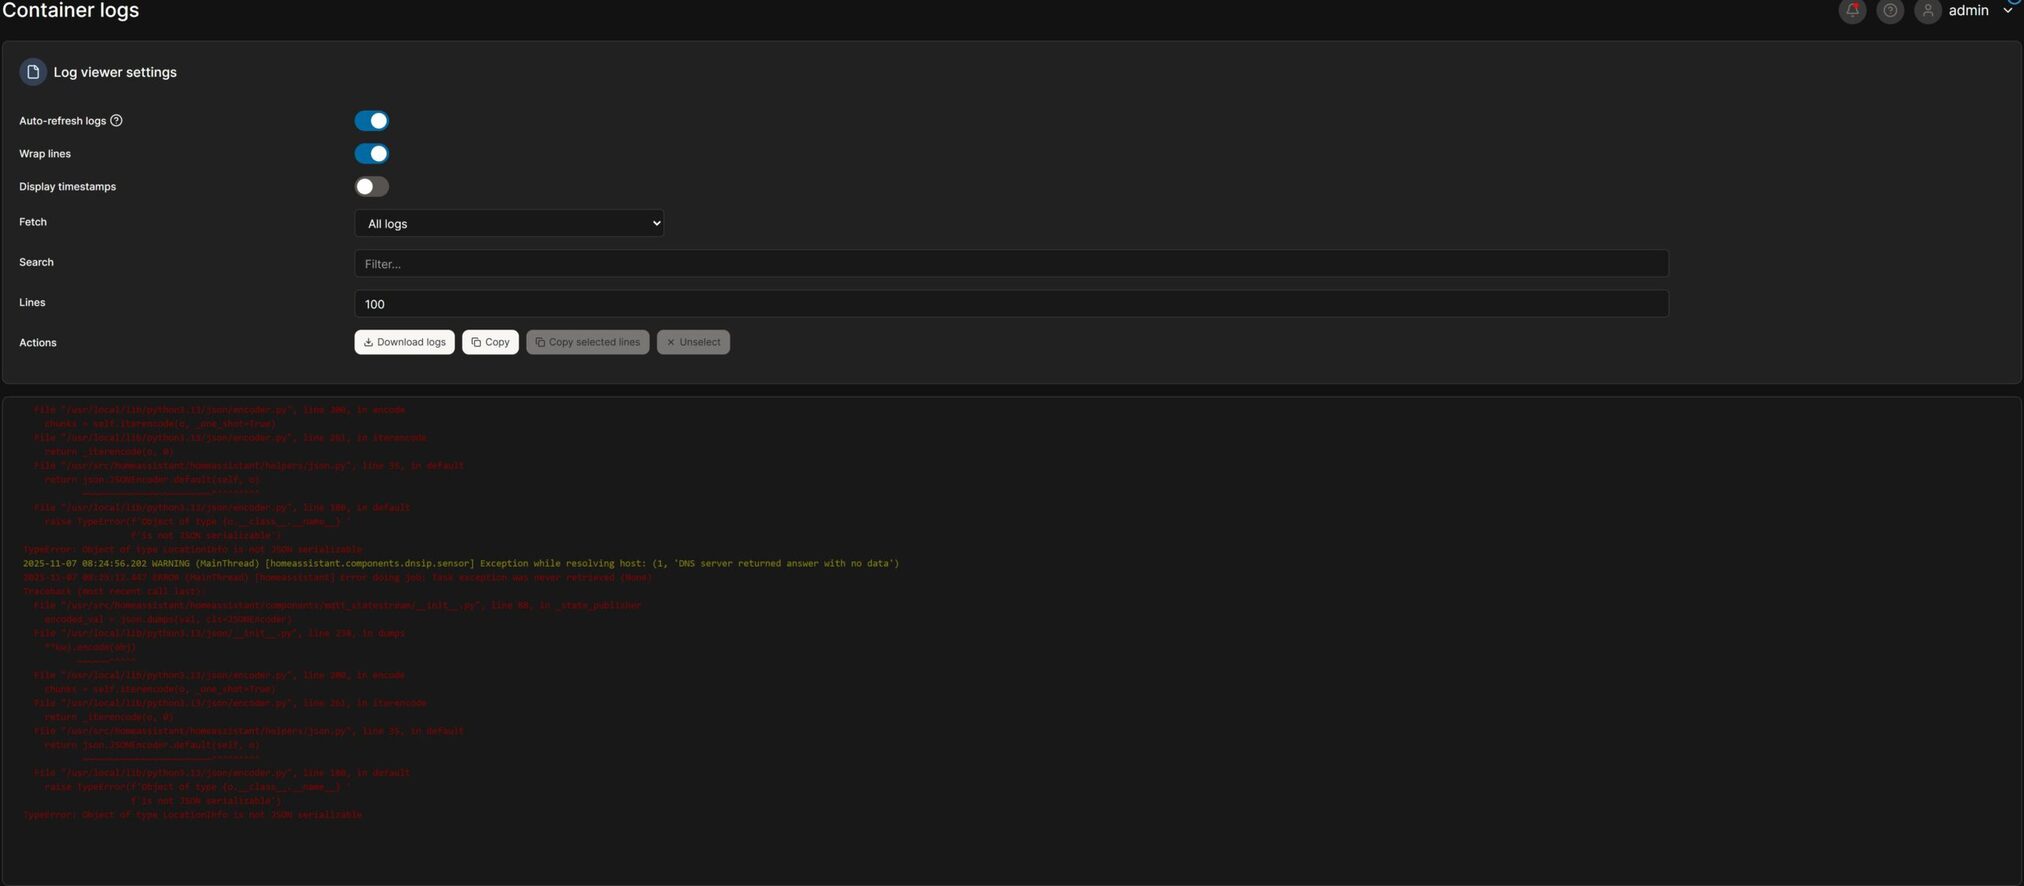
Check the logs of the container with the logs button:
You will now see the current logs of Home Assistant, and it will tell you if anything is wrong. You can set the log’s lines higher if you need to and make sure to turn off auto refresh if you need to read anything, as it refreshes every few seconds, so you can see the latest entries. Don’t mind the red as one of my sensors in complaining.
You should now be all set to use Home Assistant!
Starting the Container with Docker Compose
Now we should be ready to start up Home Assistant for the first time!
All you need to do to start the container is type:
# run with sudo if your user isn't a part of the docker group# change the .yaml file to the one that you createddockercomposecompose.yamlup-d
Bash
We can check the logs of Home Assistant with:
# run with sudo if your user isn't a part of the docker group# replace homeassistant with the name of the service that you set in the compose file from beforedockercompose-fhomeassistant
Bash
Assuming everything went well, you should be ready to configure Home Assistant itself!
Here is a quick cheat sheet for Docker Compose!
# remember to add sudo if your user isn't a part of the docker group!# bring up all services in foreground (attach)dockercomposeup# bring up in background (detached)dockercomposeup-d# rebuild images then updockercomposeup-d--build# stop services (but keep containers)dockercomposestop# start stopped services (existing containers)dockercomposestart# restart servicesdockercomposerestart# show running compose containers for the projectdockercomposeps# show logs (follow)dockercomposelogs-f# logs for a single service:dockercomposelogs-fweb# execute a shell in a running containerdockercomposeexecweb/bin/bash# or if you need tty:dockercomposeexec-Tweb/bin/bash# run a one-off command (creates a temporary container using service definition)dockercomposerun--rmwebbash# bring everything down (stop + remove containers, networks)dockercomposedown# remove stopped containers, networks, images not used by any servicedockercomposedown--rmiall--volumes--remove-orphans# build images onlydockercomposebuild# pull images onlydockercomposepull
Bash
Have fun with the greatest home automation platform in the world(in my opinion)!
If you need any support, feel free to leave a comment or message me on one of my socials! Just make sure to keep it relevant as I get a lot of scam messages and I don’t have a lot of time to waste on spam lol.
Here’s a quick tutorial on installing Docker and Docker Compose V2 on Debian! This requires that your account has sudo access.
First, we have to make sure that we have possible conflicting packages removed. Debian may ship older/unofficial packages that conflict with Docker’s official packages.
After that finishes, we can start installing Docker. Enter these line by line, minus the added comment(#) lines.
sudoaptupdatesudoaptinstall-yca-certificatescurlgnupglsb-release# Create keyring dir (if not exists) and add Docker GPG keysudomkdir-p/etc/apt/keyringscurl-fsSLhttps://download.docker.com/linux/debian/gpg|sudogpg--dearmor-o/etc/apt/keyrings/docker.gpgsudochmoda+r/etc/apt/keyrings/docker.gpg# Add the Docker apt repo (uses your Debian codename)echo"deb [arch=$(dpkg--print-architecture) signed-by=/etc/apt/keyrings/docker.gpg] https://download.docker.com/linux/debian $(lsb_release-cs) stable"|sudotee/etc/apt/sources.list.d/docker.list>/dev/null# Apply changes to aptsudoaptupdate
Bash
Next, we will install Docker Engine, the CLI, containerd, Buildx, and the Docker Compose plugin (Compose V2).
You can either run these commands as ‘sudo’ or run ‘sudo -i’ to run these commands as root.
All we need is at least SSH access and/or ftp access(to make it easier for file editing), but that is optional if you just want to quickly get this installed.
Quick Rundown: All we need to do is SSH into the device we want to install Portainer on, configure the ‘compose.yaml’ file and run it.
First, SSH into the device with your tool of choice. Ex. Putty, CMD, Terminal, etc.
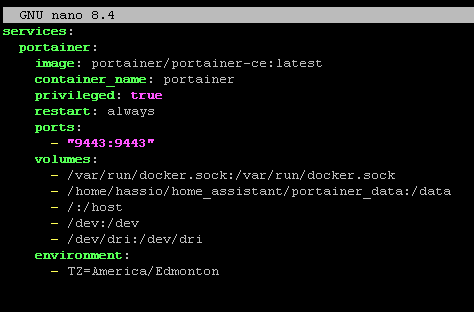
Which defines the name of the container to Docker ‘portainer’, you will use this to modify the container later.
image: portainer/portainer-ce:latest
YAML
Tells Docker what image to run. ‘portainer/portainer-ce‘ is Portainer’s Community Edition, ‘:latest’ is the tag, it will pull the newest latest tag on startup.
restart: always
YAML
This is the Docker restart policy. If the container stops (or the host reboots), Docker will automatically try to start it.
    ports:
      - "9443:9443"
YAML
Maps host port 9443 to container port 9443. Portainer uses 9443 for the HTTPS web UI by default. After it starts, you’ll access Portainer at https://<host-ip>:9443.
This binds the Docker socket into the container. This is what gives Portainer the ability to control Docker (list containers, start/stop, create volumes, etc.). VERY powerful: any process that can talk to the Docker socket can control the Docker daemon (and therefore the host).
A host directory mounted into the container’s /data — used by Portainer to store its state (users, settings, DB). This ensures data persists after container upgrades.
Make sure to create a folder so Portainer can store its data. In my case, I put it under my users folder ‘/home/hassio/home_assistant/portainer_data’, but you would probably want to do something like ‘/home/’your username’/portainer_data’ instead. If you copied the file, make sure to change ‘/home/hassio/home_assistant/portainer_data’ to what suits your needs.
    environment:
      - TZ=change_me
YAML
This sets the timezone inside the container so logs and scheduled tasks use that timezone. Cosmetic but helpful. Make sure to change the timezone name or delete it.
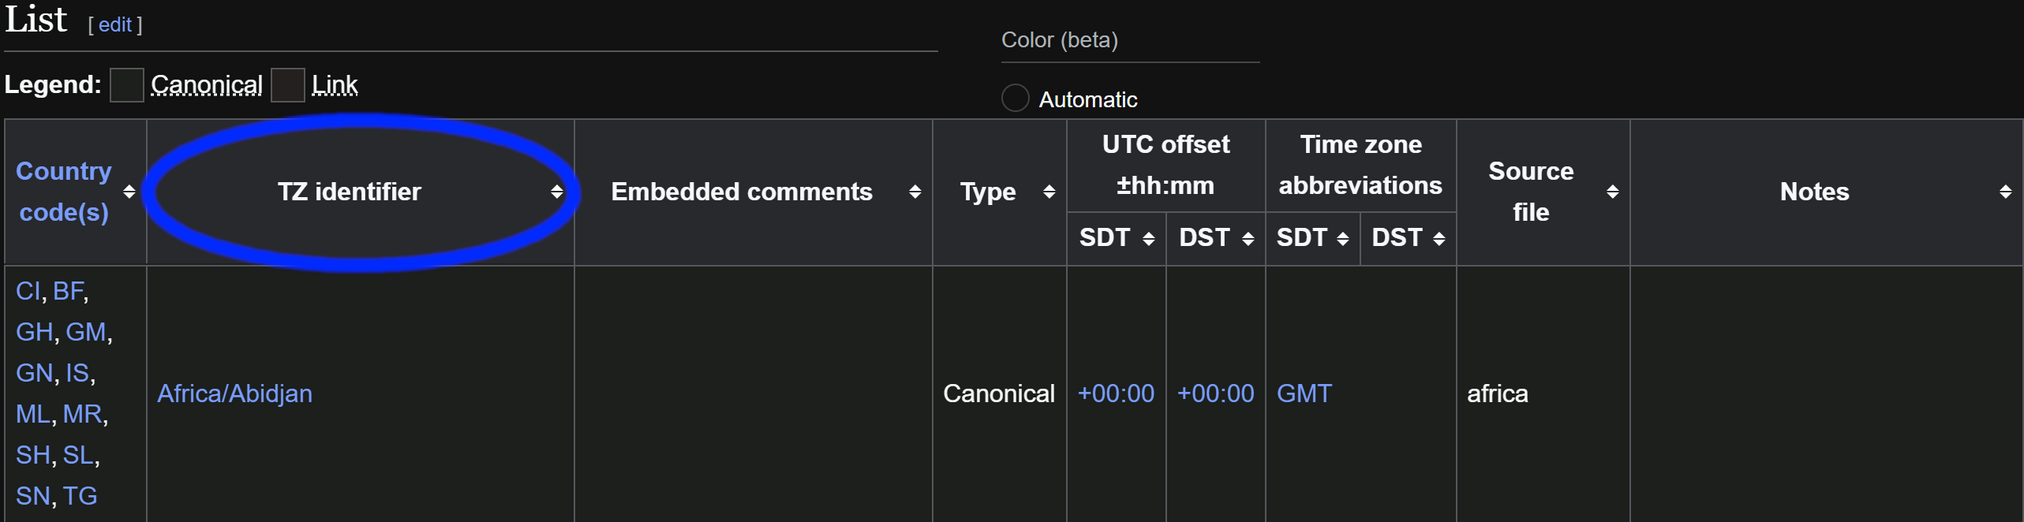
All you have to do next is change the Timezone, based on the name you find here.
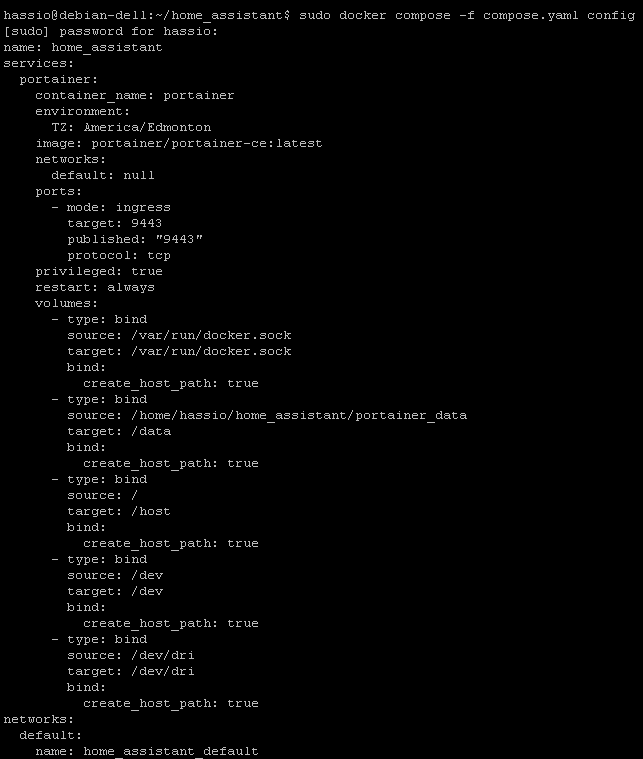
All you need to do next is run that command, replacing ‘compose.yaml’ with your filename, to validate your Compose file.
sudodockercompose-fcompose.yamlup-d
Bash
That brings the container up.
sudodockercomposeps
Bash
You can see the status of your running containers with that.
sudodockerps--filtername=portainer
Bash
Or use this one to specifically see the status of Portainer if you have multiple containers running. Make sure to change ‘portainer’ to the name that was used in the configuration file.
sudodockercomposelogs-fportainer
Bash
With this one, you can see the log file.
Now your Portainer container should be up and running!
Navigate to ‘https://<host-ip>:9443’, replacing the port number if you changed it in the compose file and replacing ‘<host-ip>’ with the device’s actual IP address.
Make sure to create a strong password, as anyone who has it will be able to change your containers and potentially do malicious things.
Copy/Paste the ‘TZ Identifier’ and add it to your Docker Compose file like so. If you don’t have the ‘environment’ section, you can copy and paste this.
    environment:
      - TZ=
YAML
Make sure you have 4 spaces from the start of the line and 2 spaces from the start of the ‘environment’ section on the next line for the ‘- TZ=’ section(6 from the beginning of the line). YAML is space-sensitive, so it will fail to compile if the spaces are wrong.
You should validate the file to make sure you don’t get any errors. All you need to do is type.
sudodockercompose-fcompose.yamlconfig
Bash
In this command, we use ‘sudo docker compose -f’, which, in this case, the ‘-f’ tells Docker Compose that we are dealing with Compose configuration files. ‘compose.yaml’ is the name of the compose file in my case. Replace it with the name of your file. Finally, ‘config’ is the command that tells it that we will parse, resolve and render the compose file.
You should get the output of the file if it validated correctly:
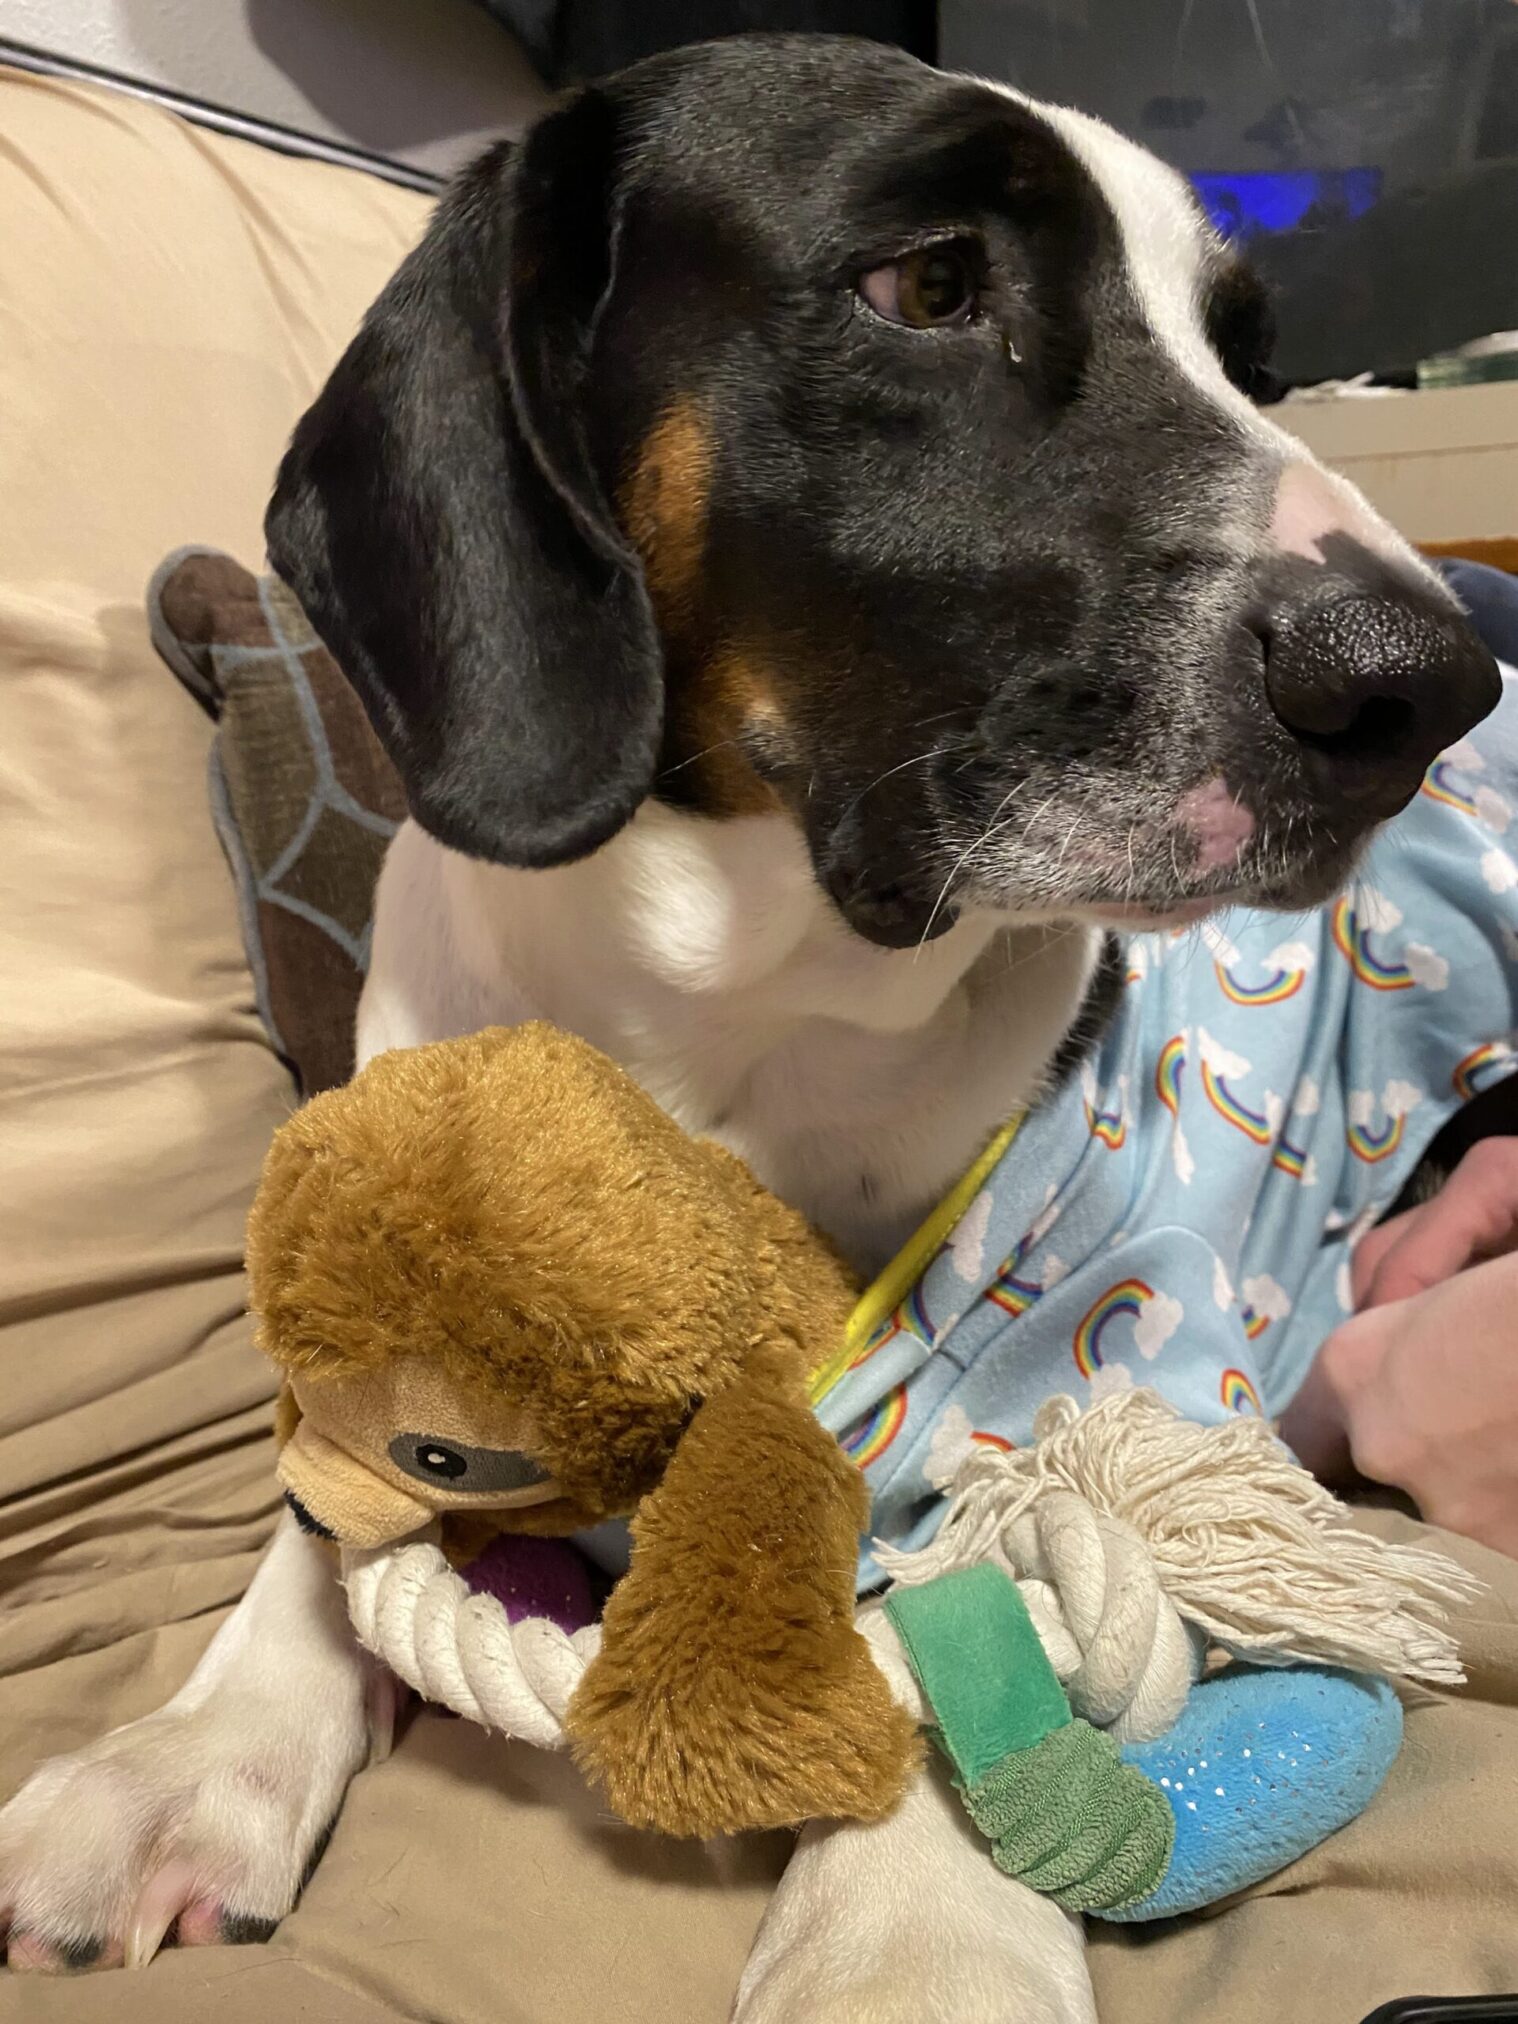
If there is one type of stuffed toy that Sir Flop can’t get enough of, it would be his Sloths from Holmes Alive.
He has managed to collect nearly every single one so far and has formed a small family, as shown above.
From left to right, he has Valorie, Charlie, Christinem, Gena, Syd, and Syd #2. When we first got him Syd, he had to have another one in the car, which is why we have two of them. There’s no arguing with a Flop and his wishes for his comfort items.
As you can tell, he quite enjoys lying with his Syds.
Even though we mess with him, in this case, he is unsure of the rocking cat toy, but he still loves them.
Even surrounded by comfort in his PJs, he still needs his Dog and his Syd.
He does play with them because they squeak and/or crinkle, but that doesn’t mean he won’t sleep with them after.
It doesn’t matter where he’s always lying with his sloths.
Even if he is wrapped in comfort, he must have a sloth toy.
They come with their own fun description that describes their own personality and traits.
There’s this handy feature on Twitch that helps you catch spam / bot messages and puts them into a place for you to review in your Stream Manager.
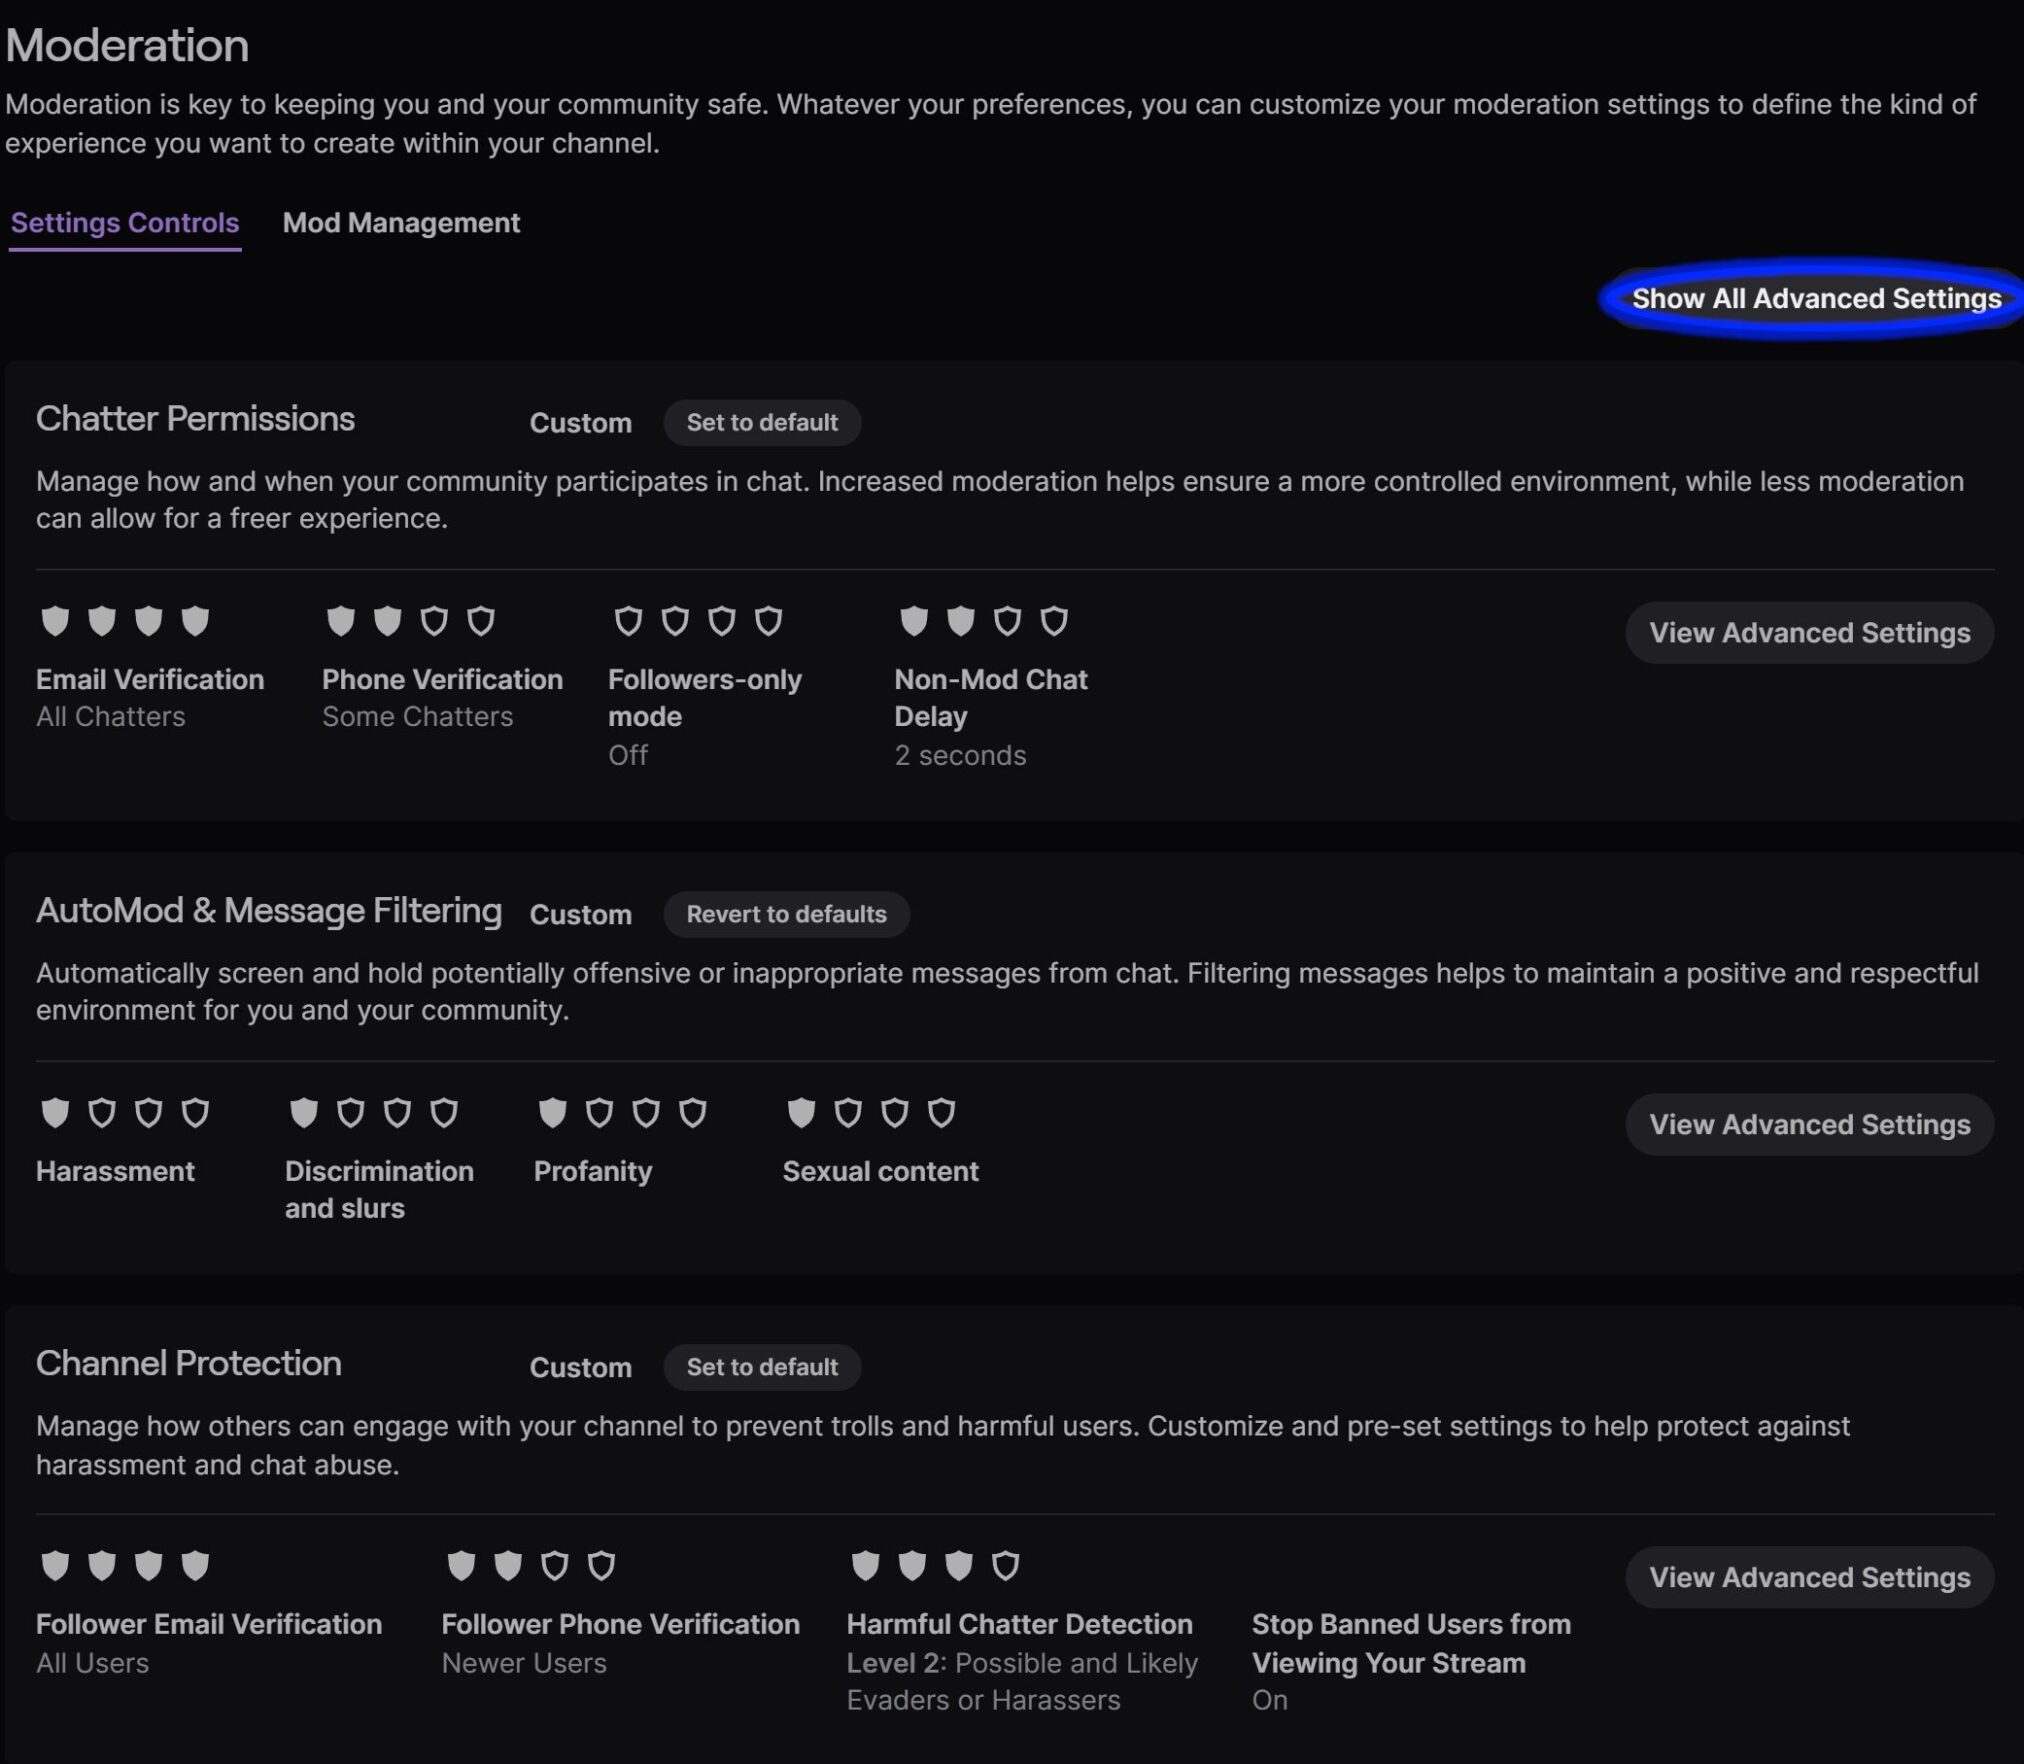
First we’re gonna open up your stream dashboard. Then we’re gonna go to Settings -> Moderation.
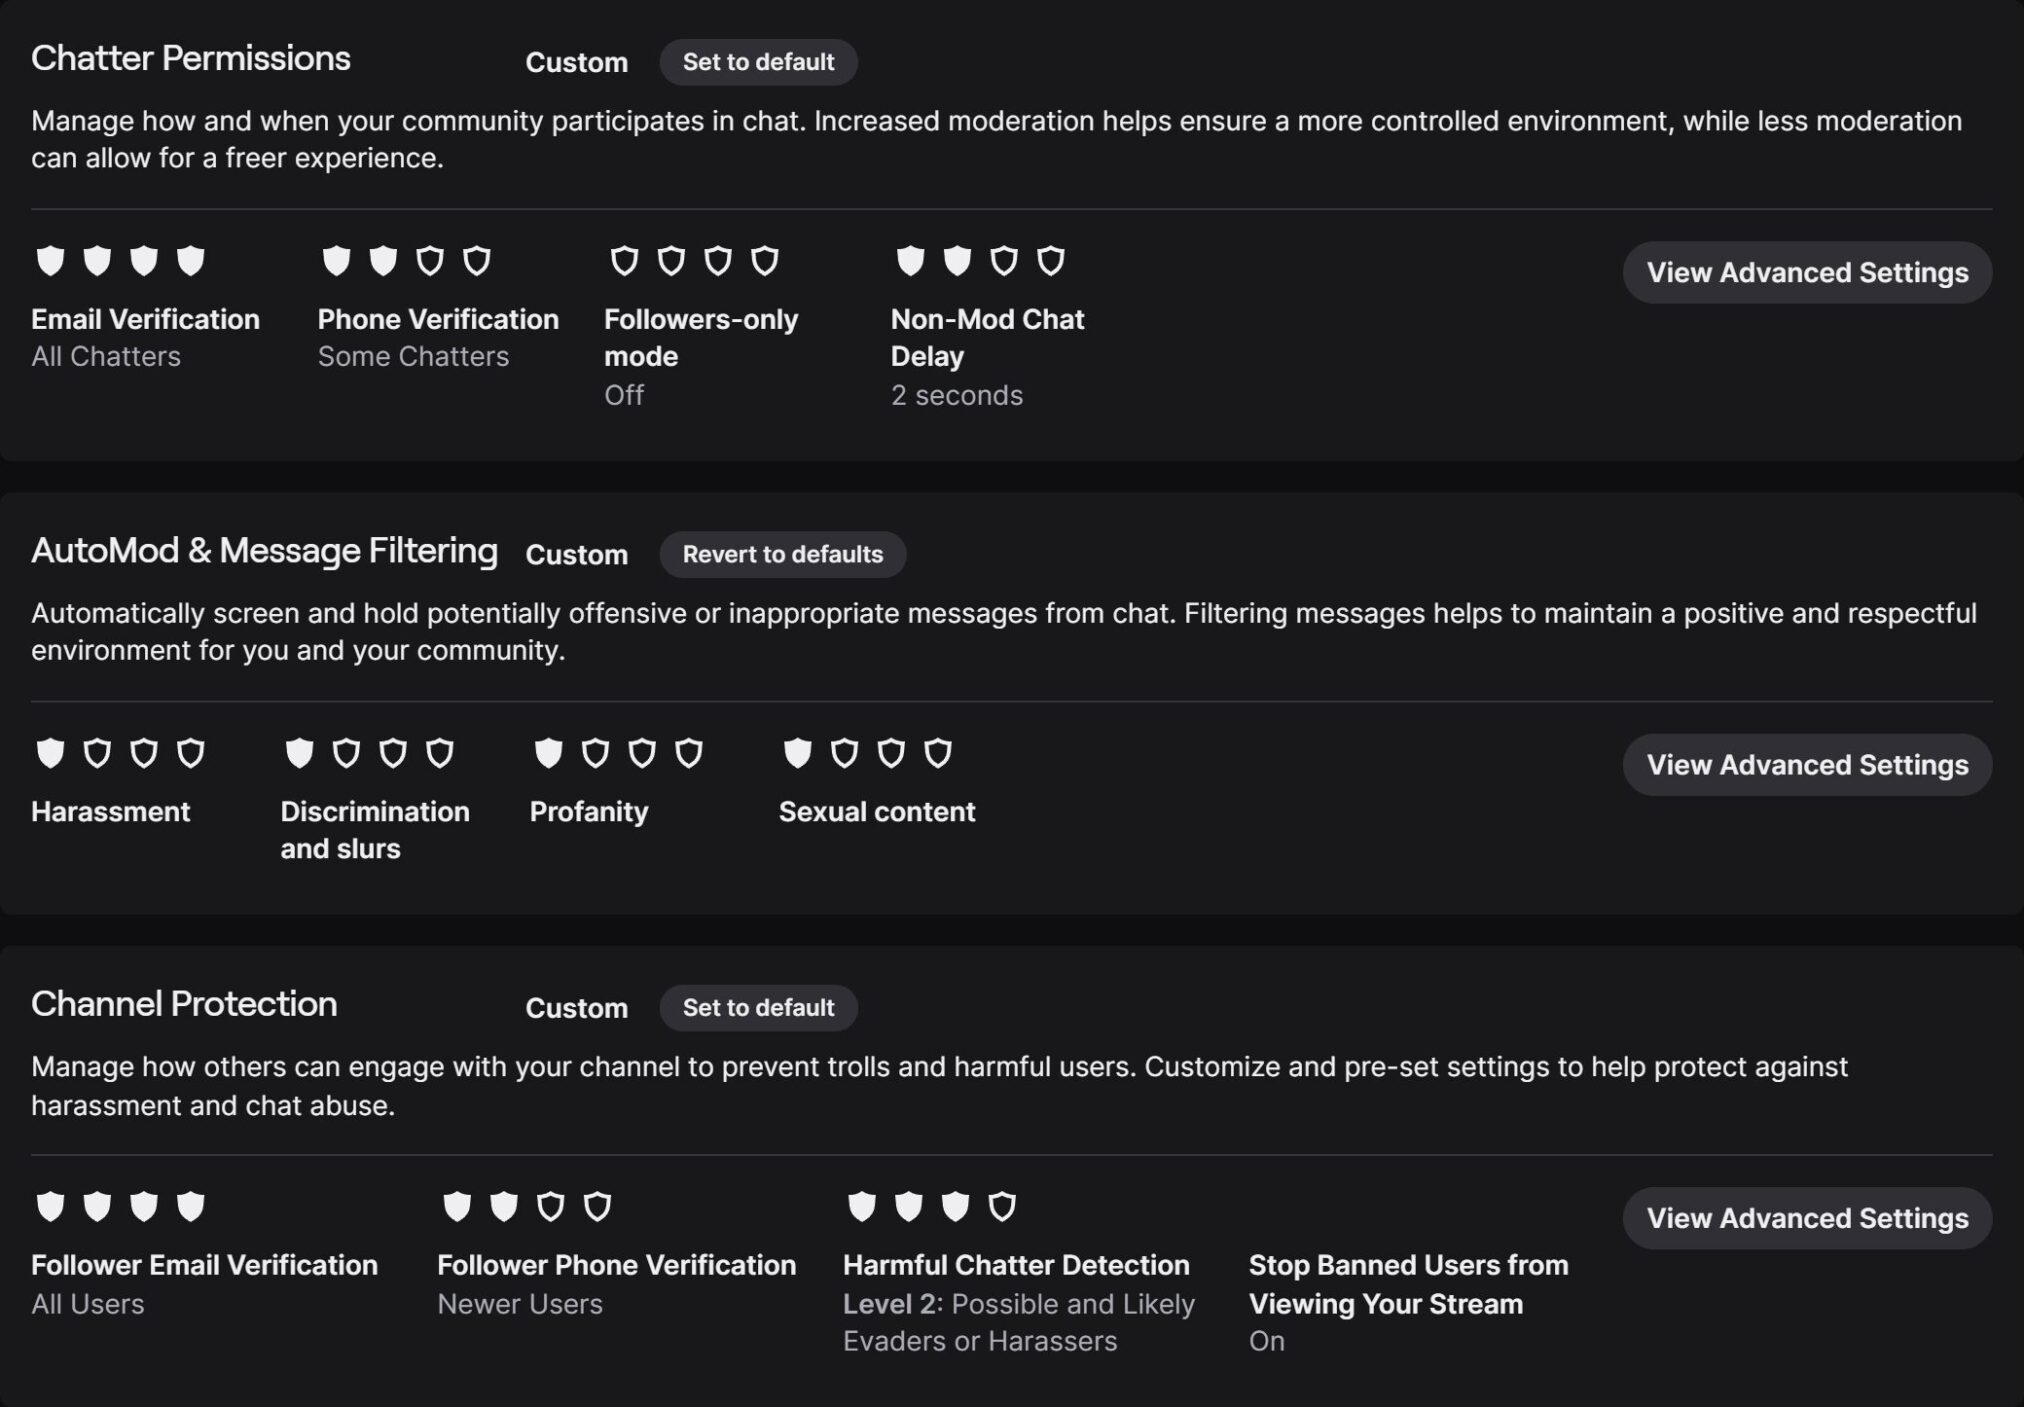
Here you can set the Chatter Permissions, AutoMod & Message Filtering and Channel Protection.
You can see at glance as to what your settings are, as shown by the sheilds for each section. The more sheilds are filled the more restrictive that section is for that specific catagory.
If you click on ‘Show All Advanced Settings’ it will expand all three of them so that you may go through each of them to adjust their settings.
If you want to know more about a specific section use these links to jump around.
Chatter Permissions
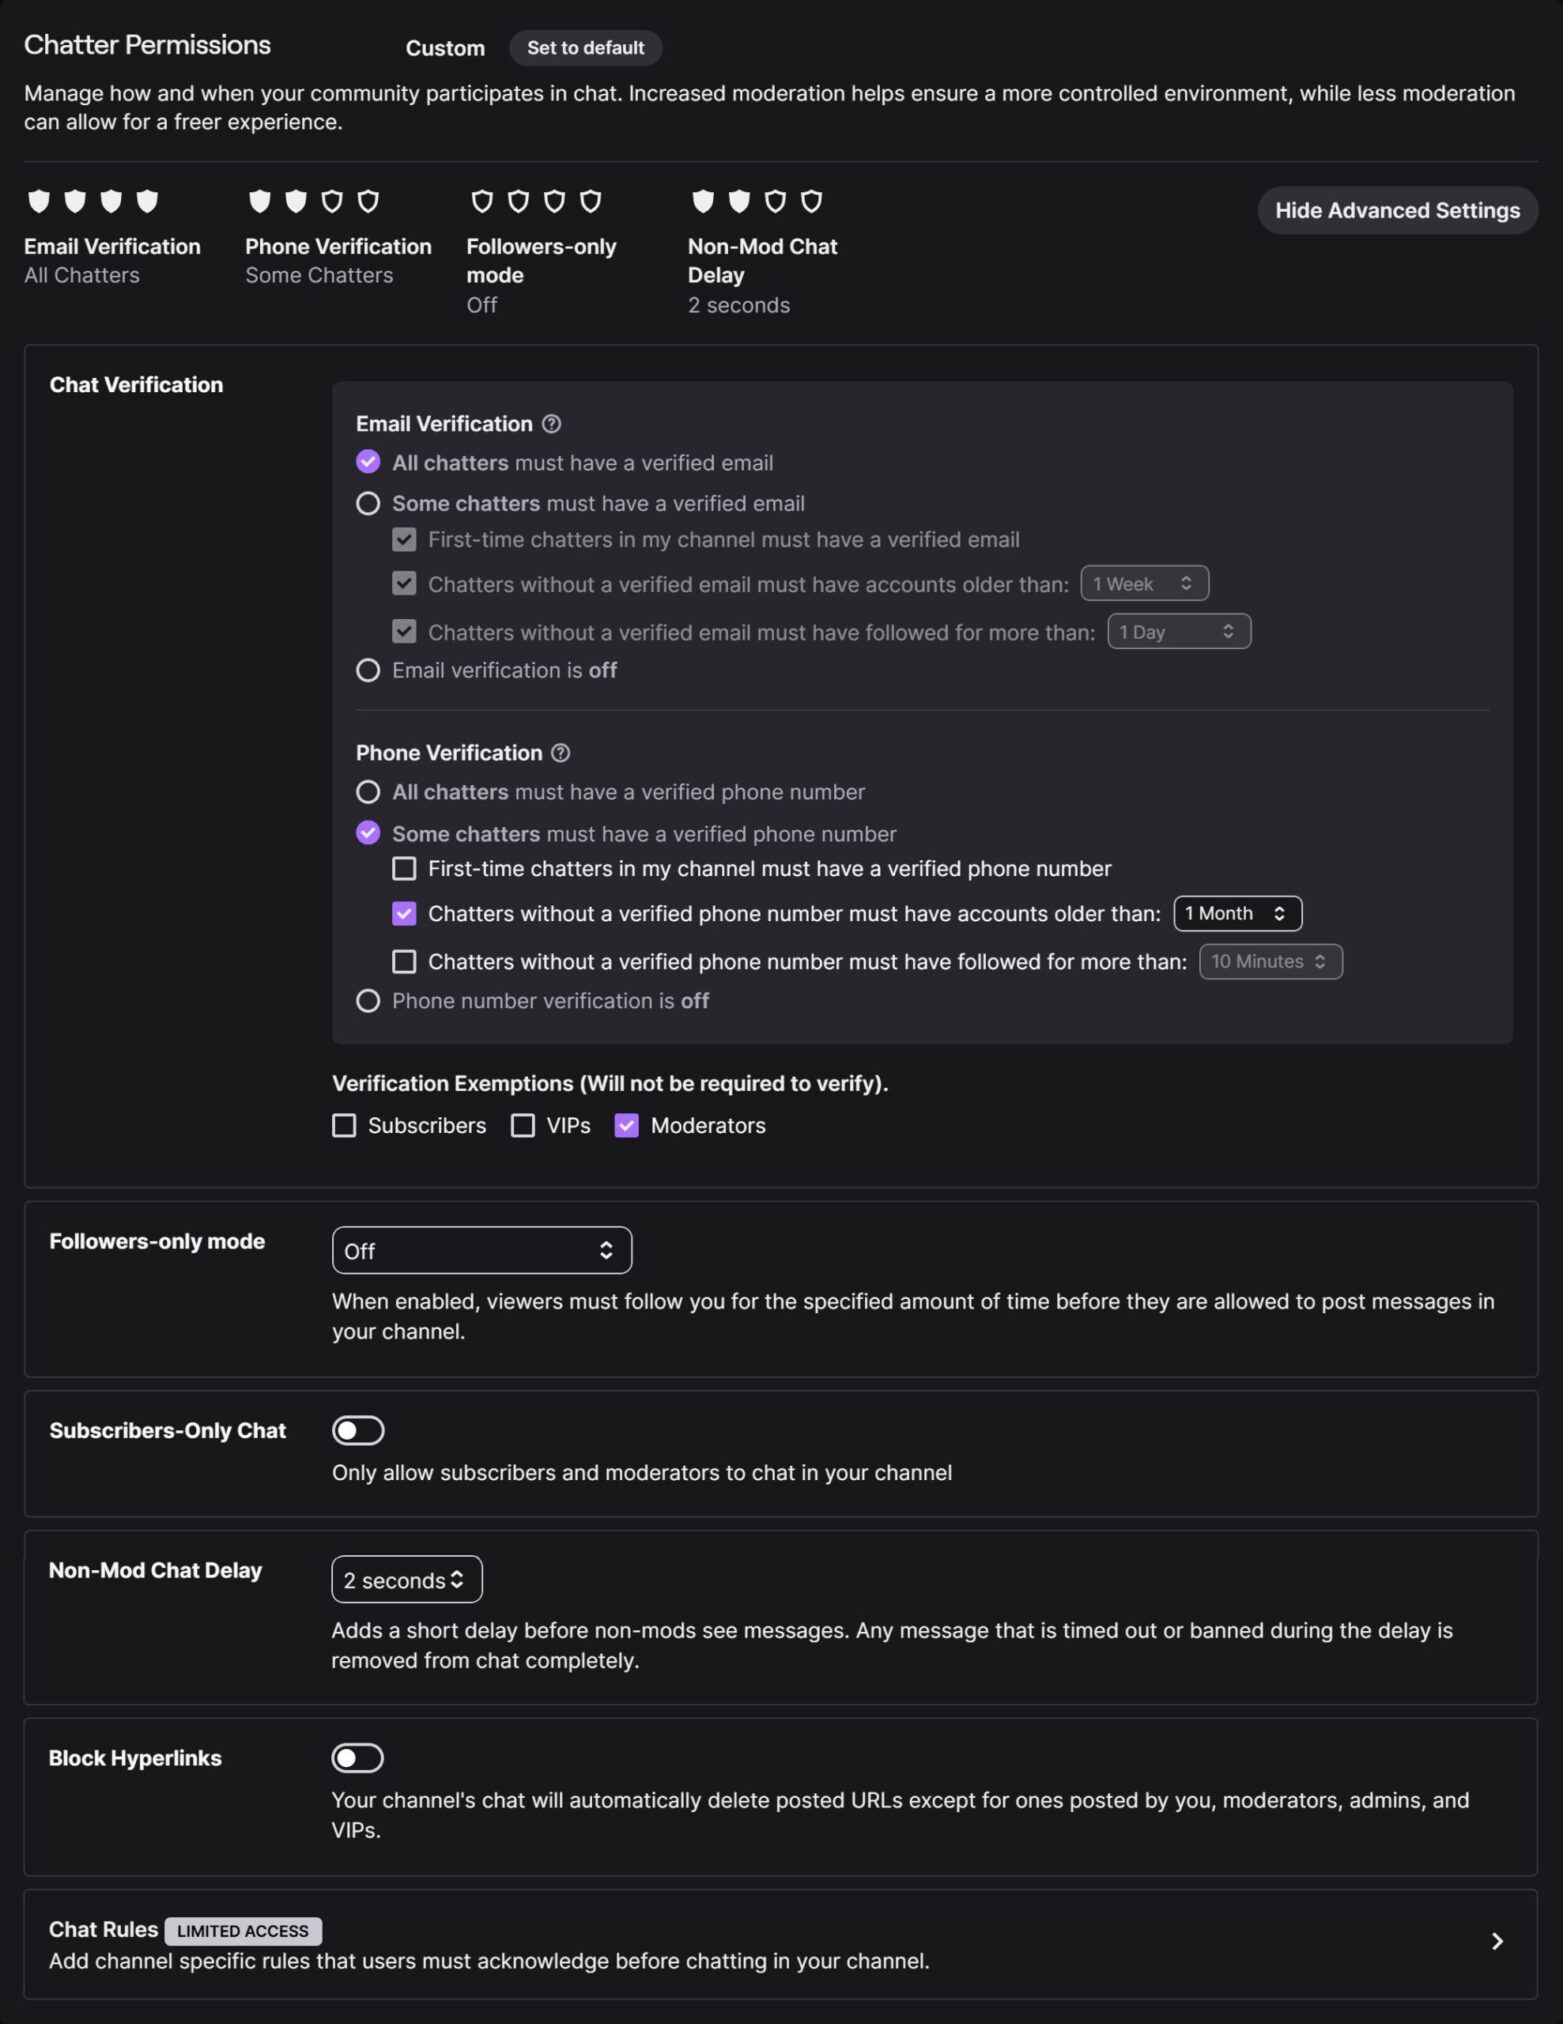
From the top down were going to start on the ‘Chatter Permissions’ section which controls who can chat and what hoops they have to go though before they can chat.
Chat Verification
Here we have Chat Verification which requires chatters to have a verified email and/or phone number older than X amount of days before they can chat. It’s a string deterrent against mass bot accounts and persistent harassers who create throwaway accounts. The only gotchya with this one is that it could raise friction for genuine viewers, especially in regions where SMS verification is unreliable.
Follower-only Mode
Next up is the Followers only mode which only allows accounts that follow your channel, anywhere from 0 minutes – 10 days to be allowed to send messages. This one helps with drive-by bots and raid spam from newly-created accounts, which is great for small communities or during growth phases. You can use a short follower wait early in a stream or longer when under spam/raid attack if that happens to you.
Subscribers-only Chat
Subscribers-only mode makes it so that only people who have subscribed to you channel are able to chat. Toggling this on is perfect for private/Q&A segments or when you want a quieter, reward-based chat. It’s also a blunt but effective anti-spam tool. Just don’t use it as default unless you want very exclusive chat.
Non-mod Chat Delay
Non-mod chat delay introduces a short delay in seconds, for non-mod messages before they appear. Mods can see messages immediately while others see them after the delay. Enabling this one could help as it gives the mods or you, time to act on problematic content before it spreads.
Block Hyperlinks
Block hyperlinks prevents messages containing links from appearing unless allowed. It stops link spam / malicious redirects and reduces low-quality bot posts. You can allow links for trusted users or via moderator approval if you want to keep functionality but reduce spam.
Chat Rules
The Chat rules shows rules and may require viewers to acknowledge rules before chatting. This helps set community expectations and gives moderators a stronger basis for enforcement.
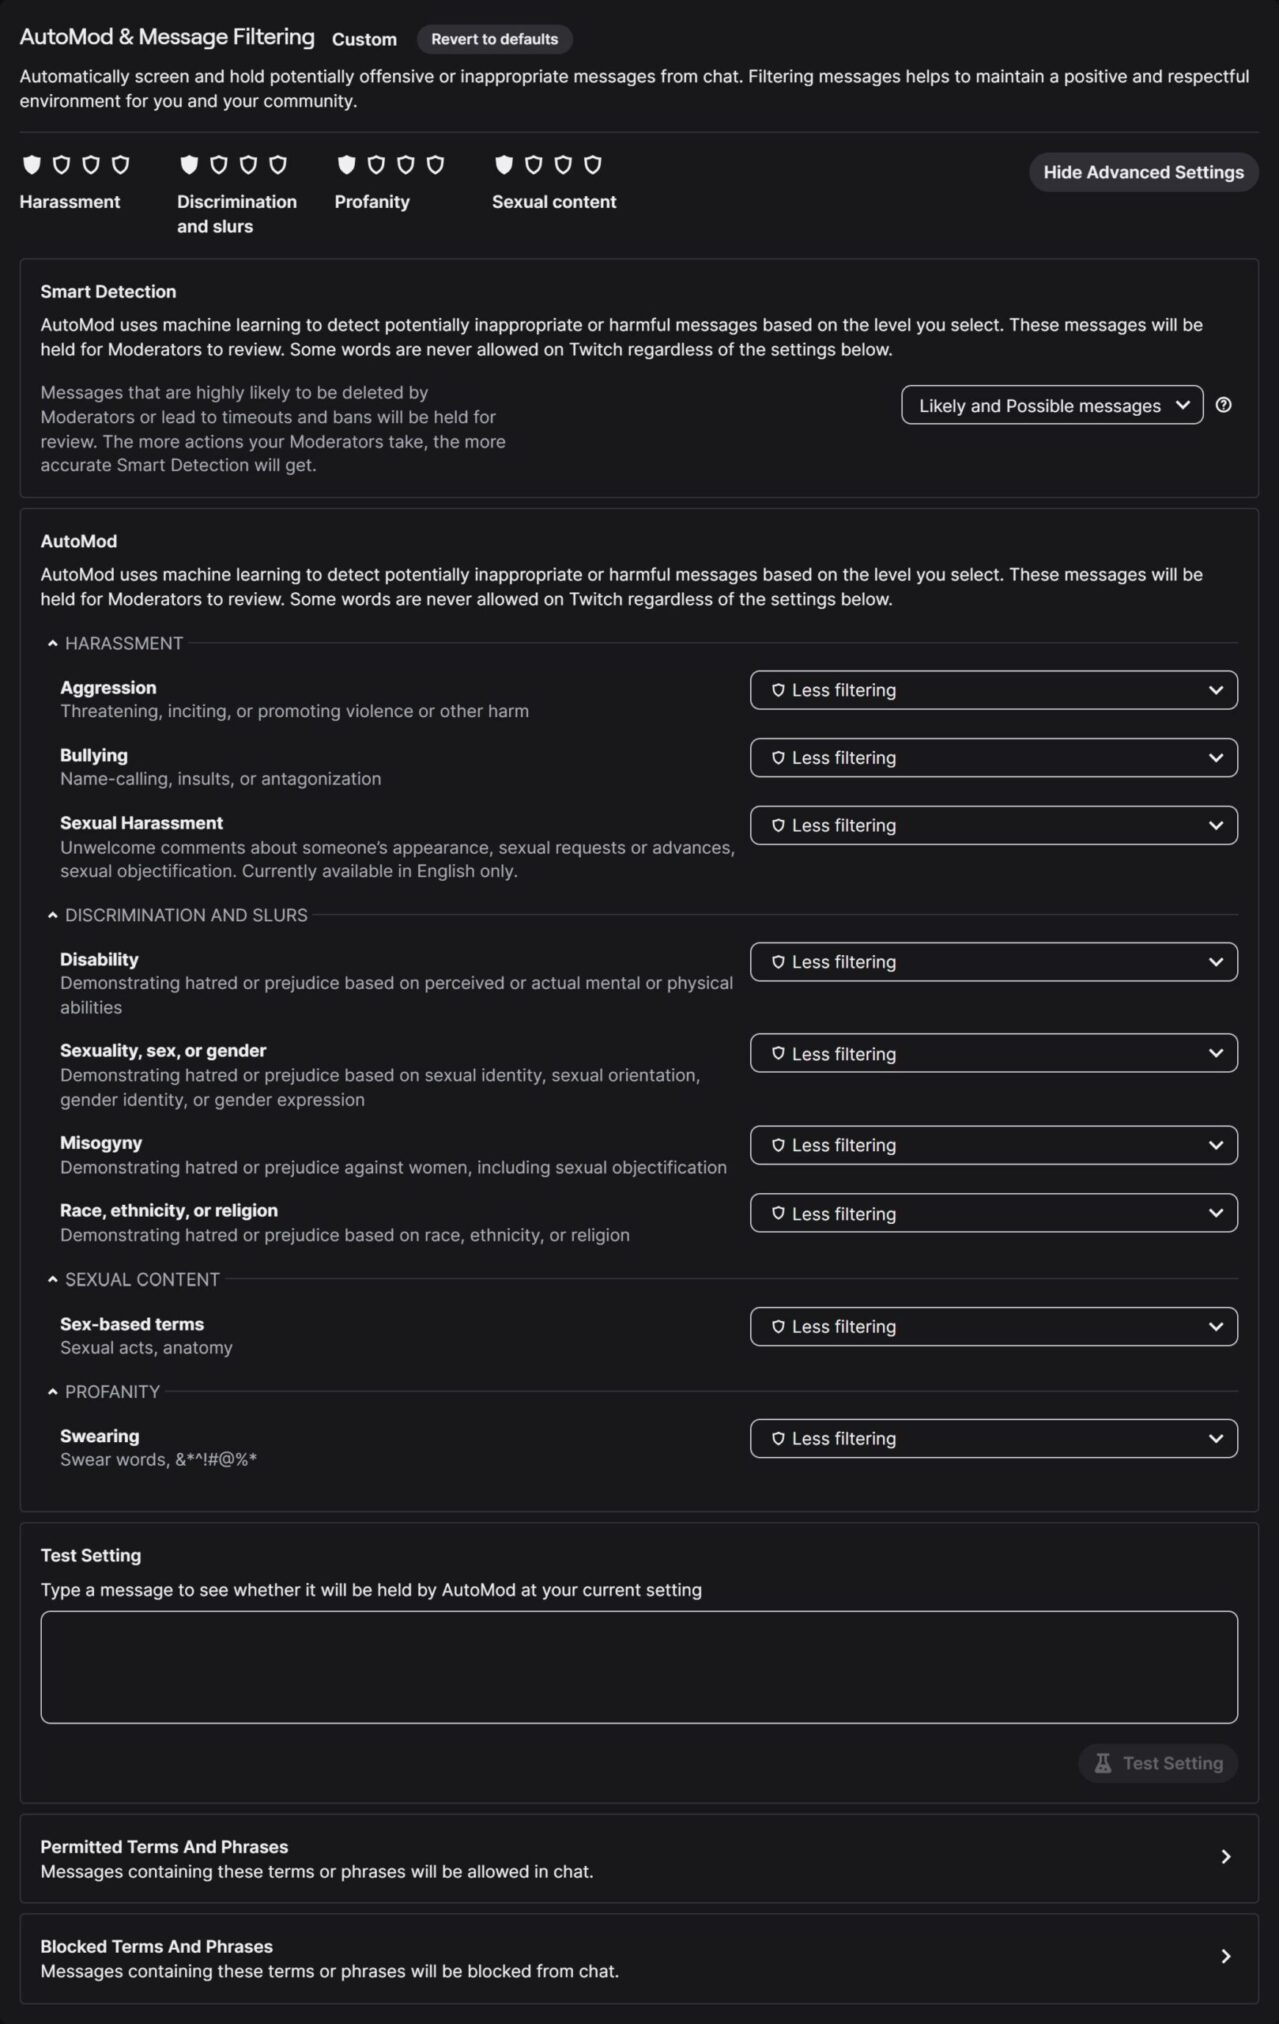
AutoMod & Message Filtering
Here we have AutoMod which analyzes messages and holds potential policy-violations for review.
We have five major sections here:
Smart Detection
Messages that are highly likely to be deleted by Moderators or lead to timeouts and bans will be held for review. The more actions your Moderators take, the more accurate Smart Detection will get.
AutoMod
Machine learning checks messages across multiple categories (Aggression, Bullying, Sexual Harassment, Disability, [Sexuality, Sex, or Gender], Mysogyny, [Race, Ethnicity or Religion], Sex-Based Terms, Swearing) and either blocks, holds for review, or lets them through depending on settings.
Start conservative (slightly stricter) and loosen for your community’s tone. Mods can approve held messages so good chat isn’t permanently silenced.
Text Setting
Here you can test your AutoMod settings. Go ahead and type the worst and not so worse of terms and phrases to see if they automatically get blocked or not
Permitted Terms and Phrases
Here you can add terms or phrases that will always be let through. Add to this as messages get blocked that you actually want to let through.
Blocked Terms and Phrases
Here you can add to this list, words that will always get blocked. Add to this one as messages don’t get blocked that you actually want blocked.
If a lot of messages from a specific catagory are getting through consider increasing one of the catagories from above.
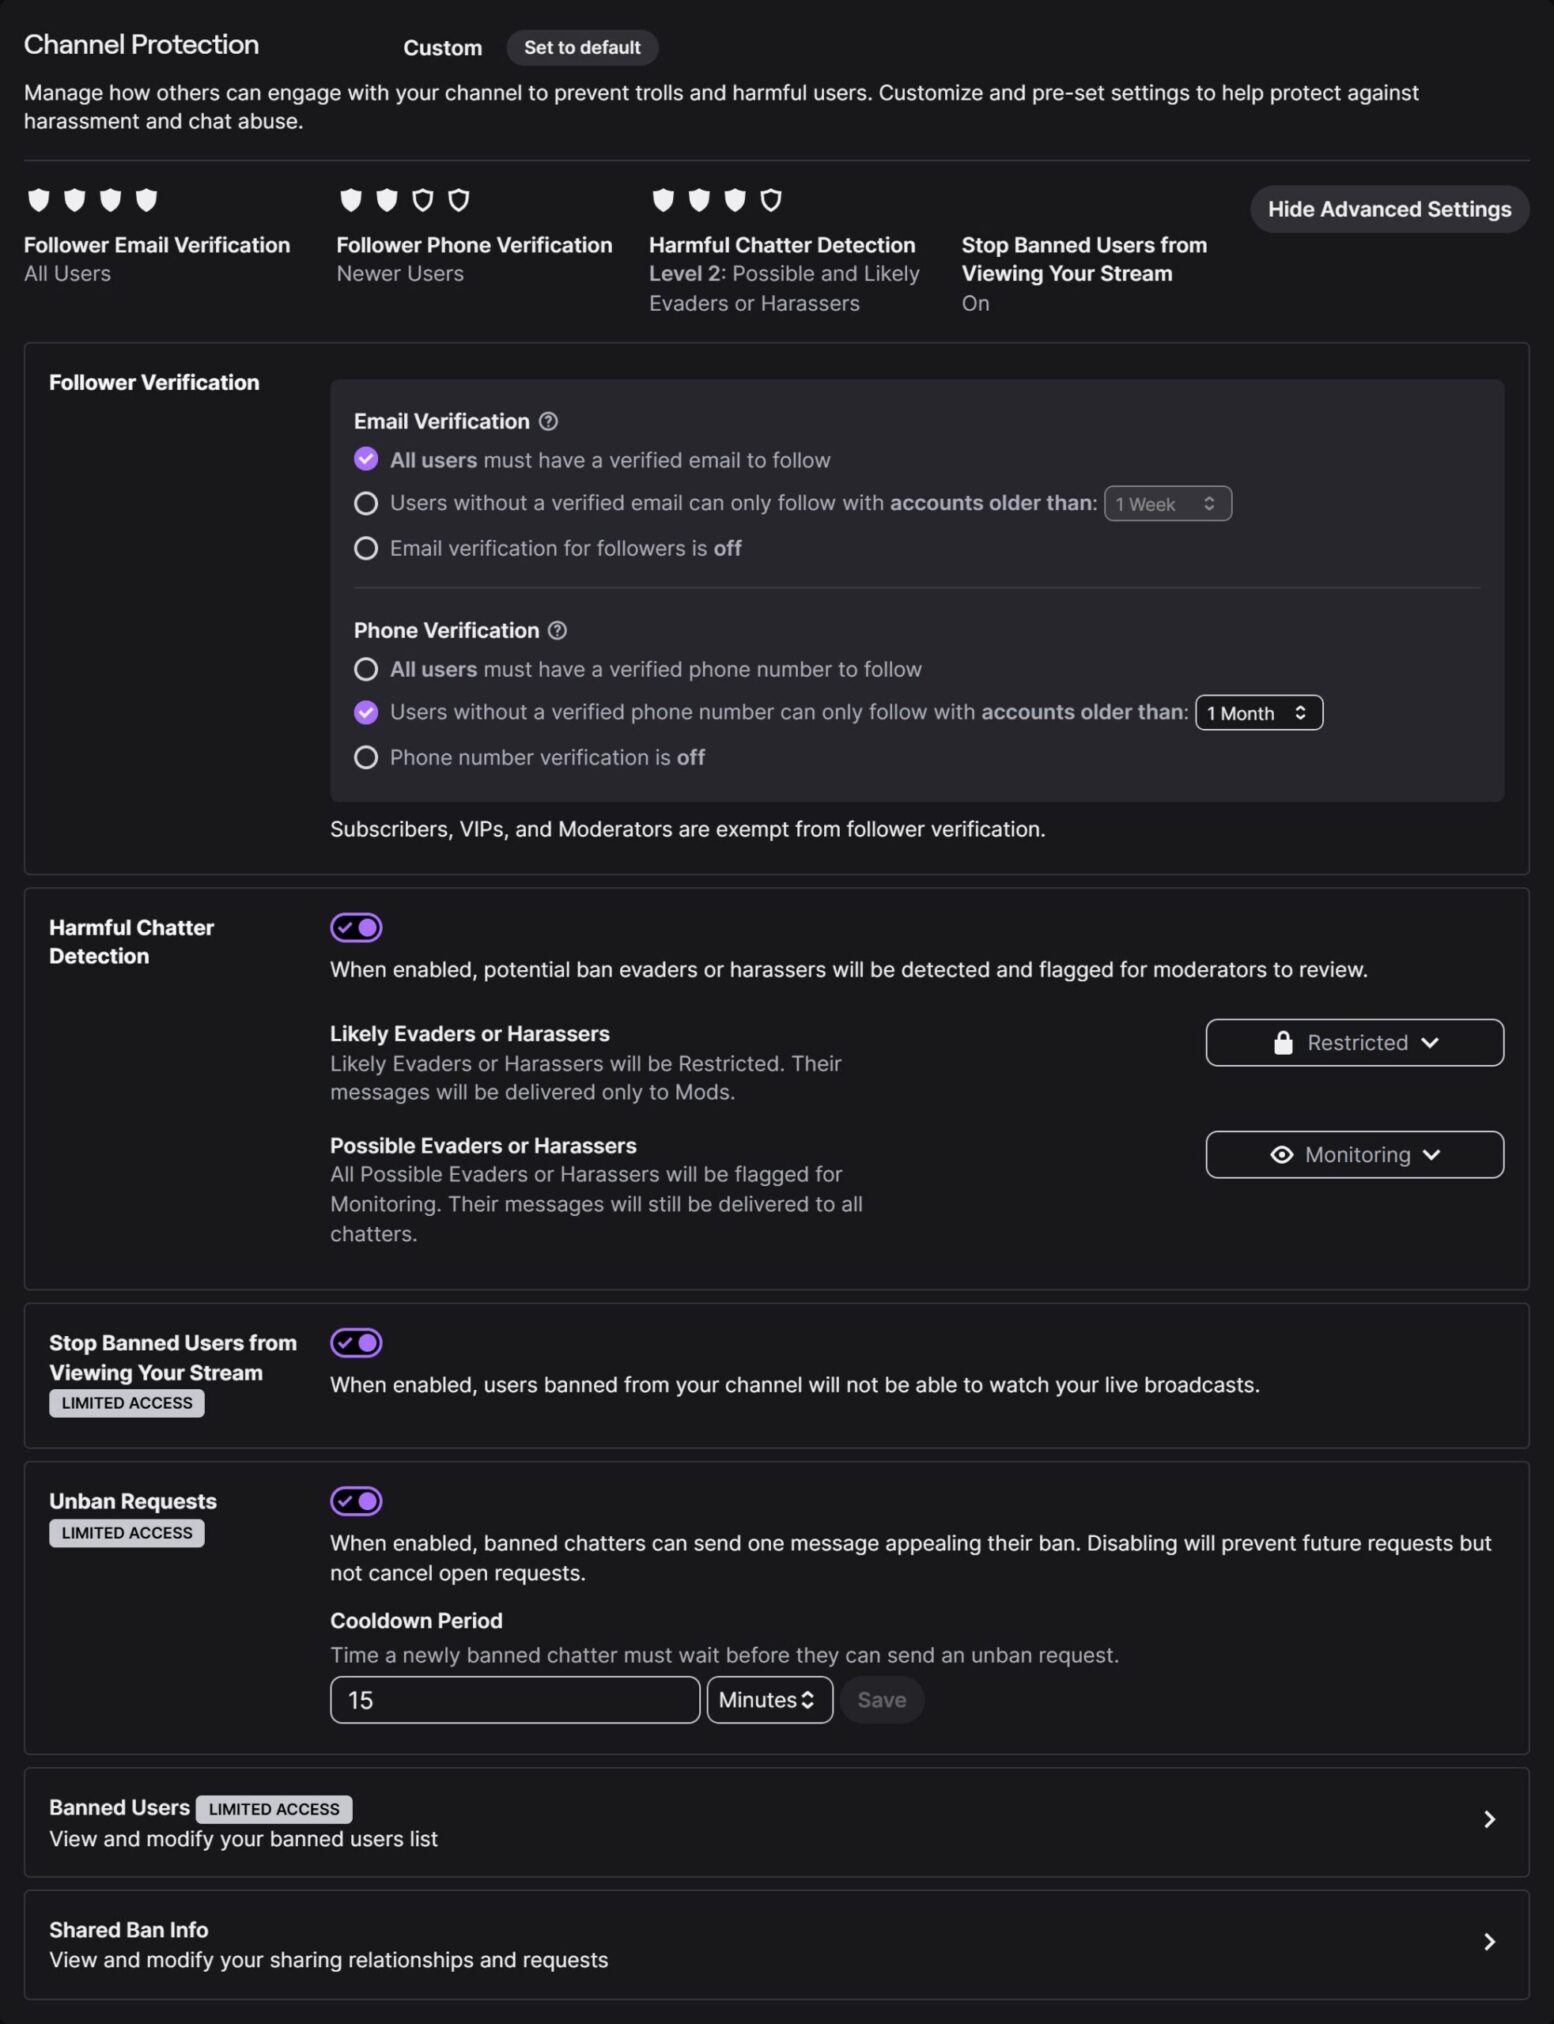
Channel Protection
Here we have six different catagories to look through:
You can use this section to manage how others can engage with your channel to prevent trolls and harmful users.
Follower Verification
Here you can set if your viewers must have a verified Email or Phone Number in order to follow your stream. It’s not recommended to set to ‘All users must have a verified phone number’, because not everyone may have the ability to attach a phone number to their account.
Harmful Chatter Detection
This is tunable detection for harassment/hate/sexual harassment categories; messages classified here can be automatically restricted or monitored. it adds another automated layer to stop abusive messages before they hit chat. Combine this with AutoMod for good coverage.
Stop Banned Users from Viewing Your Stream
Here is a simple toggle that when enabled, users banned from your channel will not be able to watch your live broadcasts.
Unbad Requests
This lets banned users submit an unban request; mods/creators see the request for review. Moderators can also view held messages and mod logs. It streamlines appeals so people who were accidentally banned have a route to be re-admitted without cluttering mod workload.
Banned Users
You can view the list of users who have been banned from your chat here. You can also add someone by their username if needed.
Shared Ban Info
You can enable this to allow information about users who have been banned for serious policy violations to be used across a group of creators (yourself included) who you choose to share with to help protect you and the other creators. It helps protect creators from known repeat offenders; not a substitute for reporting to Twitch Safety when legal threats appear.
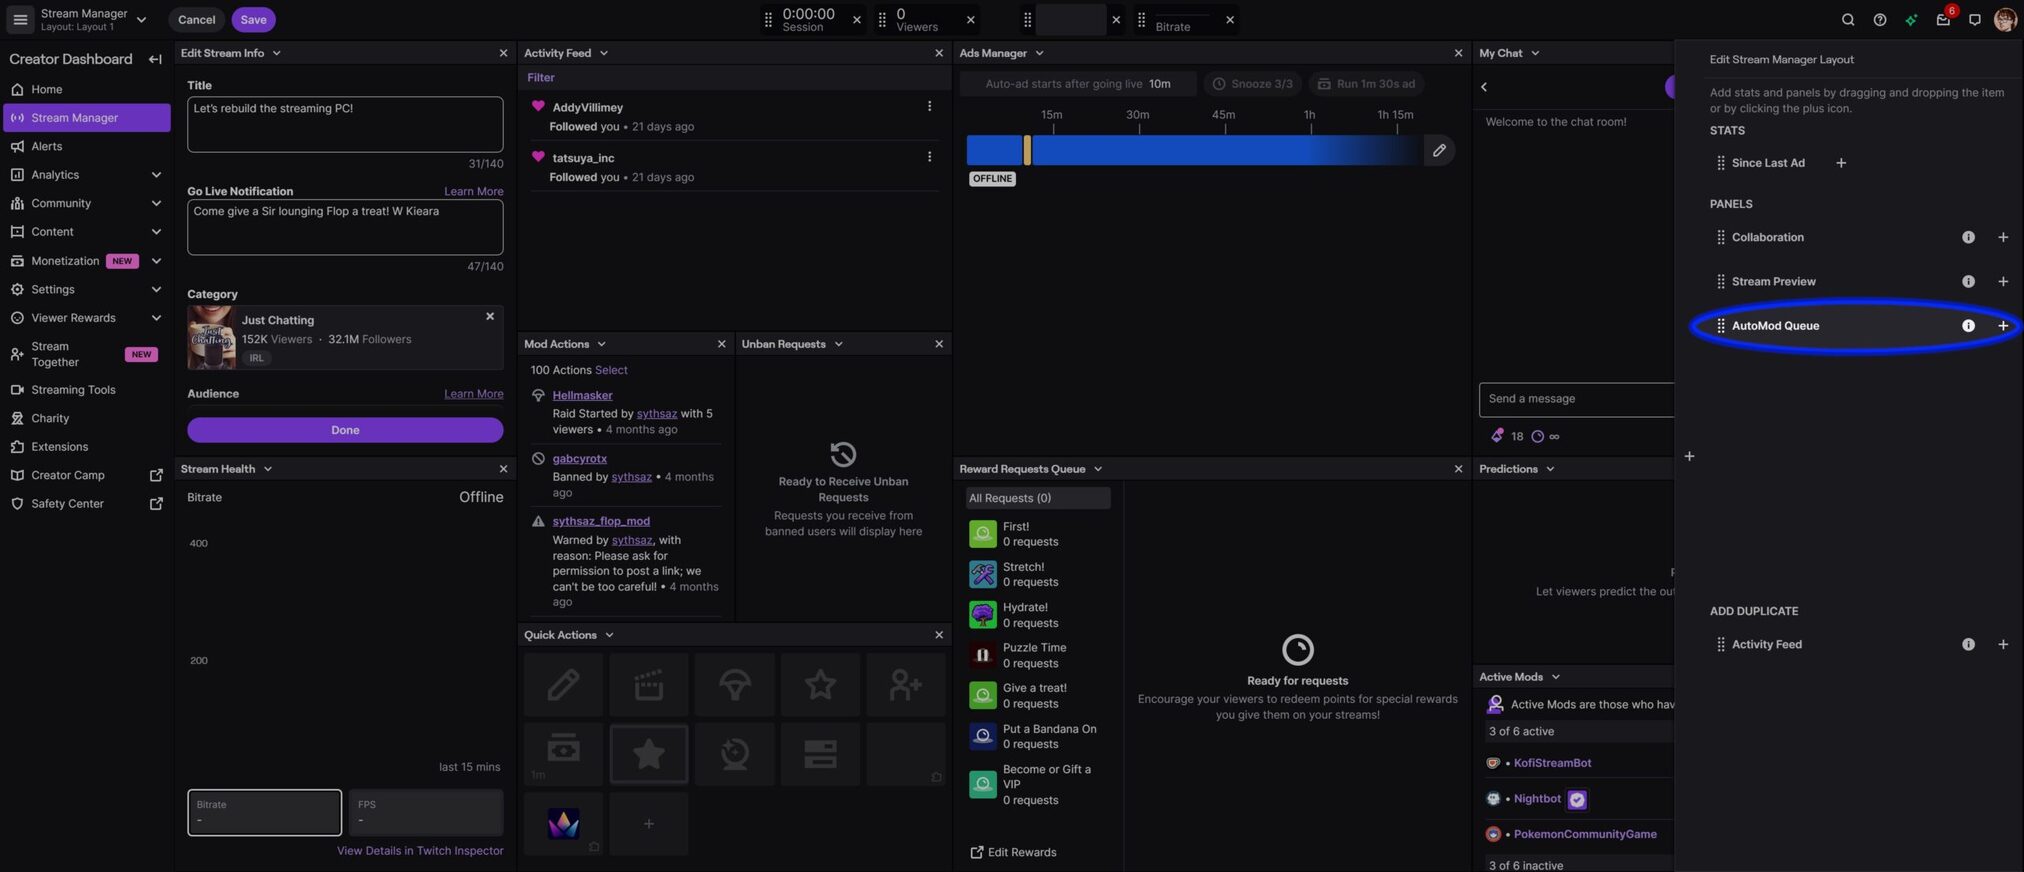
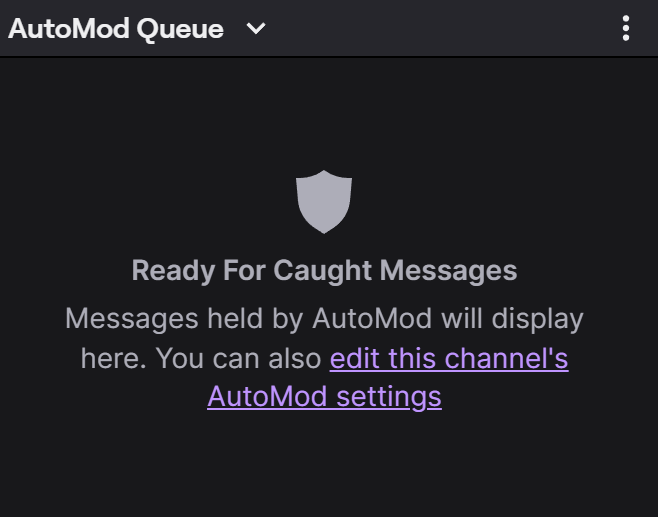
If you enabled AutoMod you can view the currently held messages from your Stream Manager by editing your Layout here:
Then add it your your Stream Layout:
Now you should see the AutoMod section wherever you added it in:
Now you should be all set to start streaming, assuming this was all that was needed.
Just keep an eye on what’s being missed in chat, maybe write down what gets blocked / allowed that you didn’t mean to each stream and double check your settings. Maybe a catagorie could be adjusted slightly higher. Maybe you have to add a couple of words to the block/allow lists.